Building

Update on Tiny Barn Build

Several of you have requested an update on the Tiny Barn Build, so I've uploaded a slideshow below so that you can see the progress. Enjoy!

As many of you know, I spent my spring break helping a friend build the shell of a tiny house. You can view daily progress of the intensive build week in the following albums: Day 1: Tiny House Foundation, Day 2: Tiny House Wall Framing, Day 3: Tiny House Subfloor & Sheathing, Day 4: Tiny House Plumbing & Wiring Begins, Day 5: Tiny House Takes Shape, Day 6: Tiny House Windows, and Day 7: Roofing in the Rain. I recapped the week in Tiny House Build Week: Lessons Learned.

Because of inclement weather (read: spring in Portland, OR), we didn't quite get the house "blacked in" during that intensive build week, so I helped out in between classes Wrapping Up the Tiny Barn Exterior. (For those of you who want to geek out on the details of connecting a tiny house to a trailer, you can find them in Tiny Barn Build: Construction Details.) Once the exterior was complete, I helped my friend move her tiny house into its new home. She has continued working on it over the past couple months and has hired a friend who is a very talented woodworker to do much of the work. Stay tuned for more photos!

Tiny House Build Week: Lessons Learned

The past couple of days pouring rain has forced me to shift to indoor activities (like taxes, scholarship essays, and catching up on emails that have piled up over the past two weeks). So I've had a chance to reflect on what I learned from our week-long tiny house build. I figure by sharing my lessons-learned I might spare someone else a bit of head scratching and perhaps enable other folks to avoid the mistakes we made. (For a full slideshow of construction details, click here.) HTT

First, building a small house that can withstand earthquake conditions requires some different considerations than traditional construction. We secured the frame to the trailer with HTT tension ties and 10 inch bolts and we'll be attaching the roof with hurricane clips, so the structure is solid. But it was tricky finding the balance between building sturdy and building light. The two aren't mutually exclusive, but to have both one must plan strategically. I certainly don't think we've maxed out the trailer's hauling capacity, but we ended up using more studs than we would have needed if we'd planned so that our sheet goods, studs, and rough openings all lined up better. I have a much better understanding of how sheer panels, tension ties, and framing work now and I'm sure I could develop a better plan now than I could have two weeks ago. I wish I'd spent a little time between the day we picked up the trailer and the day we started building to puzzle through some of the connections in advance.

fender gap

I've come to really appreciate the design-build process for its iterative aspects. One idea influences another, which affects another, which informs another. Over the past couple of months Jane and I had developed a general layout and we had salvaged quite a few materials, but we hadn't developed detailed plans. Every time I attempted more complicated drawings or Sketch Up models I was dissuaded either by questions I didn't know the answers to (like how we were going to attach the walls to the short ends of the trailer) or by reminders that whatever we thought the plan was, it would change once builder friends came on the scene. We deferred to their experience and the house emerged as the product of collective wisdom and effort. It's both similar to and different from what I imagined it would be. The layout has shifted a bit, the envelope systems have evolved, and the roofline gives the house a whole different character than I anticipated.
fender blocking

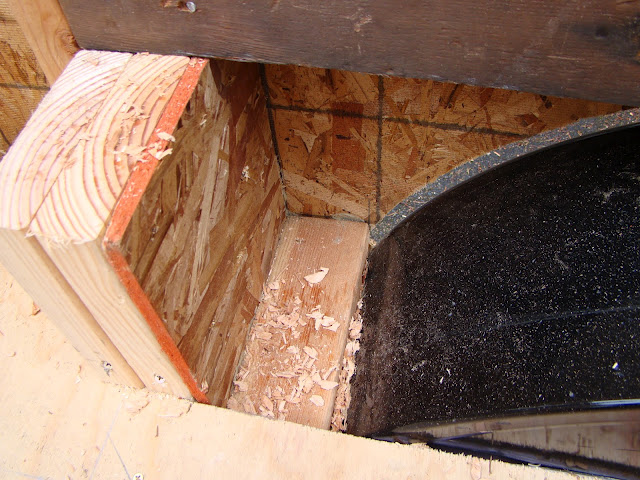
Despite a decade volunteering with Habitat for Humanity and two spring breaks of home restoration in New Orleans, I realized that I didn't know many of the details about how a house goes together. My only framing experience was building my chicken coop and solar trellis with my friends Jon and Phil, so my vocabulary expanded this week as I learned to name roof framing elements like outrigging, rakes, and gussets. I also became much more comfortable using a circular saw, jig saw, sawzall, and staple gun, though I'm still a little shy of the table saw. I learned that plywood is supposed to be oriented with the long dimension perpendicular rather than parallel to the joists and that OSB isn't necessarily a good substitute for plywood if there's rain in the forecast (if, for instance, you live in west of the Cascades!) Figuring out how to get the fenders into the wall system and close the space to the outside was a mental puzzle and I'm glad we came up with a good solution. I decided that for future tiny houses it would be great to have the fenders be structurally sound.

bubble wrap

I also learned the hard way that it's worth taking time to do additional research and planning if using an unfamiliar product. The bubble wrap we were so excited about for its reflective heating properties caused a moisture problem in our floors. When we pulled up part of the floor to start the plumbing we found that the fiberglass insulation was damp. It seems that since we sealed the bottom of the floor system with plastic then stapled the bubble wrap across the top of the joists we created a waterproof envelope. This would have been great if everything inside it was moisture free. The trouble was that the joists we were using were made from green (wet) wood so as the house sat in the sun for four days the wood released its moisture. Since there was no way for the moisture to escape it settled into the insulation where it could cause mold or rot. When we discovered the problem I contacted a company that sells the material to troubleshoot. I was informed that we shouldn't have closed up the floors till the joists had dried out. If we couldn't wait for the wood to dry, we should not have stapled the bubble wrap over the joists; the moisture could have escaped the system if we hadn't sealed it in completely. We had originally planned to run the bubble wrap inside the bays and to not lap it over the joists, but once we started stapling the bubble wrap we found it was easy to go over the joists. I didn't take the time to think through why that might be a bad idea. Now we'll have to pry up the floors we screwed and glued down so that we can remove the insulation and bubble wrap and then re-insulate. With this reminder of building science basics, I think we could use the bubble wrap effectively if we installed it properly, but I don't blame Jane a bit for deciding to take it out of the envelope completely. Removing it will impact the insulation systems for our walls and ceiling since we had planned to use it throughout the envelope. At least we were also reminded that the plywood ought to have run the opposite direction so we'll fix that while we're at it and feel very productive for addressing two concerns in one fail swoop!

A few final thoughts:

It would have been a good idea to have our supplies delivered a day early and to check the delivery for accuracy. There was something wrong with almost everything ordered. (Working with a smaller company likely would have helped!)

Double-checking that the windows all fit into their rough openings properly before putting up the sheathing would have been a good step. We skipped it and had to do a couple tweeks later.
Rainy Day

I'm thoroughly impressed with the ability of people who have been building longer than me to think through the multiple layers of a structure - planning ahead to the surfaces on either side and how they will all come together. I hope to continue honing my spatial comprehension the more I design and build.

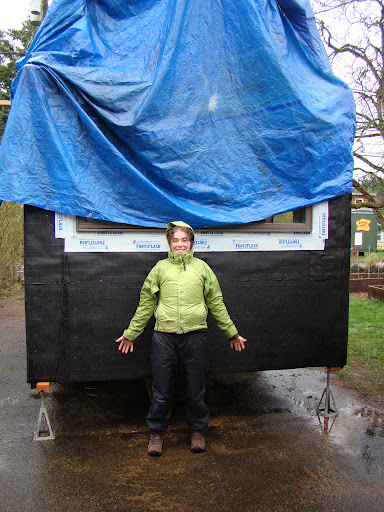
It's great to be optimistic about the weather forecast and to be willing to work through some unpleasantries. But it's also important to establish a rainy day plan so that all your hard work isn't compromised by inclement weather.

You know you're ready for a break from building when you start cracking jokes about how you're ex-sided that the exterior siding is almost finished. Get it excited, ex-sided, exterior siding. Er. Um. Yes, I can see now that it wasn't very funny. See? Time for a break!

Building the shell of a tiny house on wheels was an awesome way to spend my spring break. There will still be lots of chances to contribute over the next few weeks, so if you'd like to help out, just let me know!

Day 7: Roofing in the Rain

All week the weather forecast had predicted rain, but today it actually caught up to us. Jane's builder friends are heading home tomorrow, so we really wanted to get the roof sheathing and tar paper on today so that the house would be "blacked in" and weather tight before they left.

We set out this morning in full Gortex to see how far along we could get. We decided to unpeel the tarp from the house in 8 foot segments so we could get some of the sheathing up. We installed sheets of OSB onto two thirds of the top course of the roof and covered them in tar paper, since we realized it would be easier to cover now than it will be once the lower course is sheathed. But we weren't able to complete the whole top run because our roofing framer hadn't yet finished the outrigging support for one of the gambrel ends. Unfortunately he wasn't able to come out until the afternoon and by then the rain had picked up. We continued working through the afternoon, trying to keep things covered as much as possible. Meanwhile we continued with the plumbing and electrical. My friend Christian came to help out and he and I cut the framing for the walls at the gambrel ends, using cut requests from the roofer. It was interesting using the miter saw at several different angles and seeing the framing come together, but it was frustrating that there wasn't more we could do. With the tarp catching the wind every time we moved it the house felt like a sailboat. And with the rain pouring down I started having visions of the tiny house as an ark, floating away in the flood.

We hung around for a while since we anticipated having to work quickly to get the sheathing and tar paper up during a break in the rain. But a break never came. It continued to pour and the wind picked up so that we were afraid sheathing the roof would be too dangerous because of slipping hazards and wind gusts. Every gap in the tiny house's rain coat sent sheets of water into the house. Eventually we decided we'd be better off just getting the house as closed up as possible.

I suppose the bright side is that I was able to get a couple items checked off my to do list, enjoy a nice hot dinner, and visit with friends since I couldn't work on the house. However, it was a disappointing stopping point for a week's worth of hard work. If we had realized what a downpour we were going to get we probably would have just reenforced our tarps first thing in the morning and planned to return to the project during a break in the weather.

Day 6: Tiny House Windows

Today Noah (a friend from Whitman College) and Aaron (a friend from my grad program) came out to help with the build. Together we finished tar papering the house and then helped put in the windows. All the windows are now in their rightful places and they look great! We covered the edges of the window flanges with a waterproofing flashing so the exterior of the house is now ready for siding.

It's such a joy to have the windows in. This was a big step for me since windows add so much character to a building. Now it's starting to feel like a house instead of a construction project! I loved walking through the house this afternoon to get a feel for what it will be like to lounge on the window seat or to look out the kitchen window.

Meanwhile the roofing framer put up all the trusses and added supports for the roof's overhangs. I helped by cutting a few pieces for him and admired -  from a safe vantage point - his fearlessness about clambering around on the roof while using a circular saw to cut notches into the top of the roof rafters. The builders had to leave the site mid-afternoon for another appointment, so I helped tarp the house and we wrapped up early. A quiet evening at home and early to bed for me!

We've already cut the sheets of OSB for the roof sheathing so we're ready to put it up first thing in the morning. We're all eager to get the house dried in since the Portland spring promises plenty of rain.

Day 5: Tiny House Takes Shape

The progress today is less visible, but we managed to accomplish quite a bit despite the rain. A roofing framer, came out this morning to figure out the plan for the tiny house roof. The tiny house is taking shape and it's not so tiny anymore. Now it's starting to look like a miniature barn!

Jane has wanted to maximize the usable space in the lofts because she feels like my sleeping loft is too claustrophobic. We considered creating dormers flush with the exterior wall by extending the walls higher on the half of the house with the sleeping loft. That would create two pitches to the roof, one steeper and one shallower. We decided to put the decision off until later but once we had sheathed the exterior we realized we would have a hinge point if we built a pony wall above the existing wall. One of the builders came up with the best idea yet when she suggested a gambrel roof. I'd considered one on another tiny house I'd dreamed up but for some reason it never occurred to me that Jane's tiny house would have a gambrel roof. Turns out, it does. The roofer mocked up the first set of rakes late this morning and Jane was delighted.

While the roofer figured out his measurements we built the sleeping loft so that we can stand on it while working on the roof. Just when we stopped for a quick lunch break we encountered the rainiest part of the day, so after lunch we set up our saws under the carport. Half of us spent the afternoon prepping gussets with jigsaws while the rest of us cut rakes on the miter saw so that we can get the roof framing up tomorrow. Meanwhile the doorman came to drill holes in the new door. Another friend will be picking it up tomorrow to finish the door. It's going to be really lovely! In the evening we stapled tar paper on the lower portion of the house to protect the OSB from the rain and put tarps over the whole house to protect it from the rain tonight.

Jane decided to celebrate a great fifth day by taking her builders to dinner at a German restaurant down the street. I asked what the most German thing on the menu was. They recommended the roulade which was beef and pork wrapped in a cabbage leaf, covered in a tomato sauce, and served with mashed potatoes. It was decidedly German and quite tasty! We toasted the tiny house and had a great time unwinding from a drizzly day.

It will be an early start tomorrow and I'm glad a couple more friends have agreed to come on out to help!

Day 3: Tiny House Subfloor & Sheathing

Today I got to the site early to take pictures of construction details so that we can recall what we've done after we've closed everything in. Then I finished insulating the gap between the interior floor box and the exterior wall with rigid foam insulation so that we could get our subfloor into place. Meanwhile, everyone else finished up the fourth wall and cut blocks, cripples, and headers. A neighbor saved the day by loaning us his nail gun and staple gun, so the framing went much more quickly today!

Ricardo and Zef (two of my classmates) and John (a fellow tiny house dweller) came by to lend a hand today as well. John crawled around under the trailer to seal all the seams with aluminum tape. (We should have done this before we put the floorbox into the trailer frame, so we're very grateful John was up for the task!) Ricardo and I made a trip to Builders' City to pick up the door we found while Zef and John got the 3/4" tongue and groove subfloor into place (at least temporarily - we'll need to remove part of it again to do our plumbing). It was pretty impressive to see how far the house progressed just while I was away on this errand!

This afternoon we got several sheets of 1/2" OSB sheathing up. Most tiny houses use a glue and screw method: gluing all the sheathing to the studs and then screwing them into place. Since we don't anticipate this house traveling far or often we decided to go for liberal use of glue and 1 1/2" staples. We wrapped up a little earlier than usual since we were at a good stopping point and the sky was looking threatening. We hope to get the other sheets of sheathing hung in the morning so we can move on to roofing on Tuesday.

We have been brainstorming plumbing, electrical, and roofing details this evening. Lots of decisions to make tomorrow!

Day 2: Tiny House Wall Framing

Today we got started around 9:00 on a beautiful sunny morning. First off, half of us launched into measuring and cutting studs for the first wall. The rest of us added 3 1/2 inches of 23" wide fiberglass insulation to the floor boxes (the joists are 24" on center). Fortunately it was faced and there were only 10 bays to fill, so it went quickly and painlessly.

While Jane picked up a few more supplies at the hardware store, we added a layer of reflective bubble wrap to the floor. The reflective material was an idea borrowed from some friends. When they were building their house they discovered that the local pet store was throwing away reflective bubble wrap envelopes that were used to transport tropical fish, so these friends started collecting it. They used it in their solarium, but had lots left over so Jane bought some from them. The reflective material works by reflecting heat back into the house when the shiny side is towards the interior of the house. It requires an air gap between the bubble wrap and the interior wall or floor in order to work properly, so we stapled it about an inch below the top of the joists. By the time we were finished we felt like we'd created a solar people cooker. The bright sun reflecting off the surface was making us shed all the extra layers we were wearing when we arrived at the job site!

As her friends continued with the wall framing, Jane and I ran around town in her trusty truck, on the hunt for a narrow door and a shower pan (turns out the shower surround we found by the side of the road that we thought would be perfect wouldn't do). We managed to find a 34" x 34" shower pan at a local plumbing supply store and got a deal on it because of a minor blemish that we never would have noticed if they guy hadn't pointed it out.

Finding a narrow door with either full or half lites that we could cut down to 78" didn't prove as easy. We had known there was a pretty good chance that we wouldn't end up using the sliding glass door Jane had envisioned. But we were thwarted when our back up plan to use a 24" door fell apart, too. As the stud layout came together we discovered that a 78" door was the tallest we could accommodate. The 24" door is metal and can't be cut down to 78." So we visited the ReBuilding Center, Habitat Restore, Builder's City, and Home Depot and had to return to the site without a door. The new doors we looked at today were wider and taller than we wanted, most of them weren't pre-hung, and they were all pretty expensive considering that any of them would need some modification. We decided to plan for a 28" door since that's the size Jane wants. We'll keep investigating our options and perhaps the right door will come our way.

We returned to find that we were nearly ready for a wall raising. I put metal flashing onto the trailer frame on the outside of the internal floor box and covered it with a membrane material that's usually used to prevent wicking from concrete into framing. In our case we're hoping it will protect the wood framing from the metal framing. We settled the walls into place on the exterior edges and bolted them down through HTT tension ties. As we all worked on nailing the tension ties to the studs it started sounding a whole lot like a construction site!

At the end of the day half the team worked on securing the top plate to the long walls and tying the three walls together. Meanwhile the rest of us cut cripples for above and below the long window for the window seat. I discovered that there's a big difference between working with dry wood and working with wet wood. The wood we had salvaged has been drying for years so it's super hard. My poor little Makita impact driver that has served me well for home improvement projects a a chicken coop build wasn't up to the task. Fortunately, tomorrow we'll be able to borrow a nail gun and that should help speed up the rest of the framing.

We're eager to get the fourth wall up tomorrow. Hopefully we'll get some sheathing on as well. The weather has been splendid but we know we're unlikely to be so lucky for long.

Day 1: Tiny House Foundation

Today was the first day of our week-long tiny house build and we're relaxing after a productive day. We've just finished a splendid supper and we're making our shopping and to do lists for tomorrow.

We started out just before noon with a feasibility test of sorts as we described our plans to Jane's friends who are helping with the tiny house build. They have more construction experience than Jane and me, so we were anxious to make sure that our design is build-able. We knew there would be some figuring out and some troubleshooting, but it was a little nerve-wracking trying to explain the construction details we'd basically invented. Since we wanted to maximize the space of the trailer we had a custom trailer built so we weren't able to rely on many of the design details that many other tiny housers have already developed. Fortunately, a few moments playing with 2x4s and 2x6s enabled us come up with a plan to move forward.

Our goal for the day was to get the foundation finished and we're very pleased we succeeded. We started out by building the floor box for the central portion of the trailer. We screwed eleven 75" 2x6s to the two 20 ft 2x6 rim joists. (We was pretty exciting about using the impact driver - what a fun new toy!) Then we flipped the whole assembly over and tacked 6 mm plastic and rolled aluminum flashing to the frame. The moment of truth came when we flipped the frame over again and settled it into place inside the trailer. With a few whacks of the sledgehammer it fit snugly into place. Once it was settled, we bolted the central floor box and the 2x6s on the other side to the trailer frame with 6" long 1/2" bolts. We'd special requested 5/8" holes drilled horizontally through the sides of the custom trailer frame at the corners and on either side of the wheel wells. The extra $5 per hole seems to be worth the time saved drilling through the steel ourselves.

We cut 1" extruded polystyrene insulation to fit in the bays. (Unfortunately, Home Depot made a couple of errors in the order and delivered some of the wrong materials, so we actually ended up with mostly 3/4" foam. We decided to go with it anyhow since we were eager to get the insulation in.) Once we had the rigid foam insulation in place, we spray foamed all the edges. We decided to wait on adding any additional insulation till tomorrow morning. The weather report is for clear skies so keep your fingers crossed for us!

As evening approached we worked out a revised stud layout that is a compromise between the plentiful windows Jane wants and her builder friends' insistence that we have more wall surface for increased shear strength. We marked the stud layout onto the sill plates on the exterior walls so that we can tackle it in the morning.

Tomorrow will be an exciting day as we'll be laying the subfloor and framing up the first of the walls. Stay tuned!

Trailer Lust

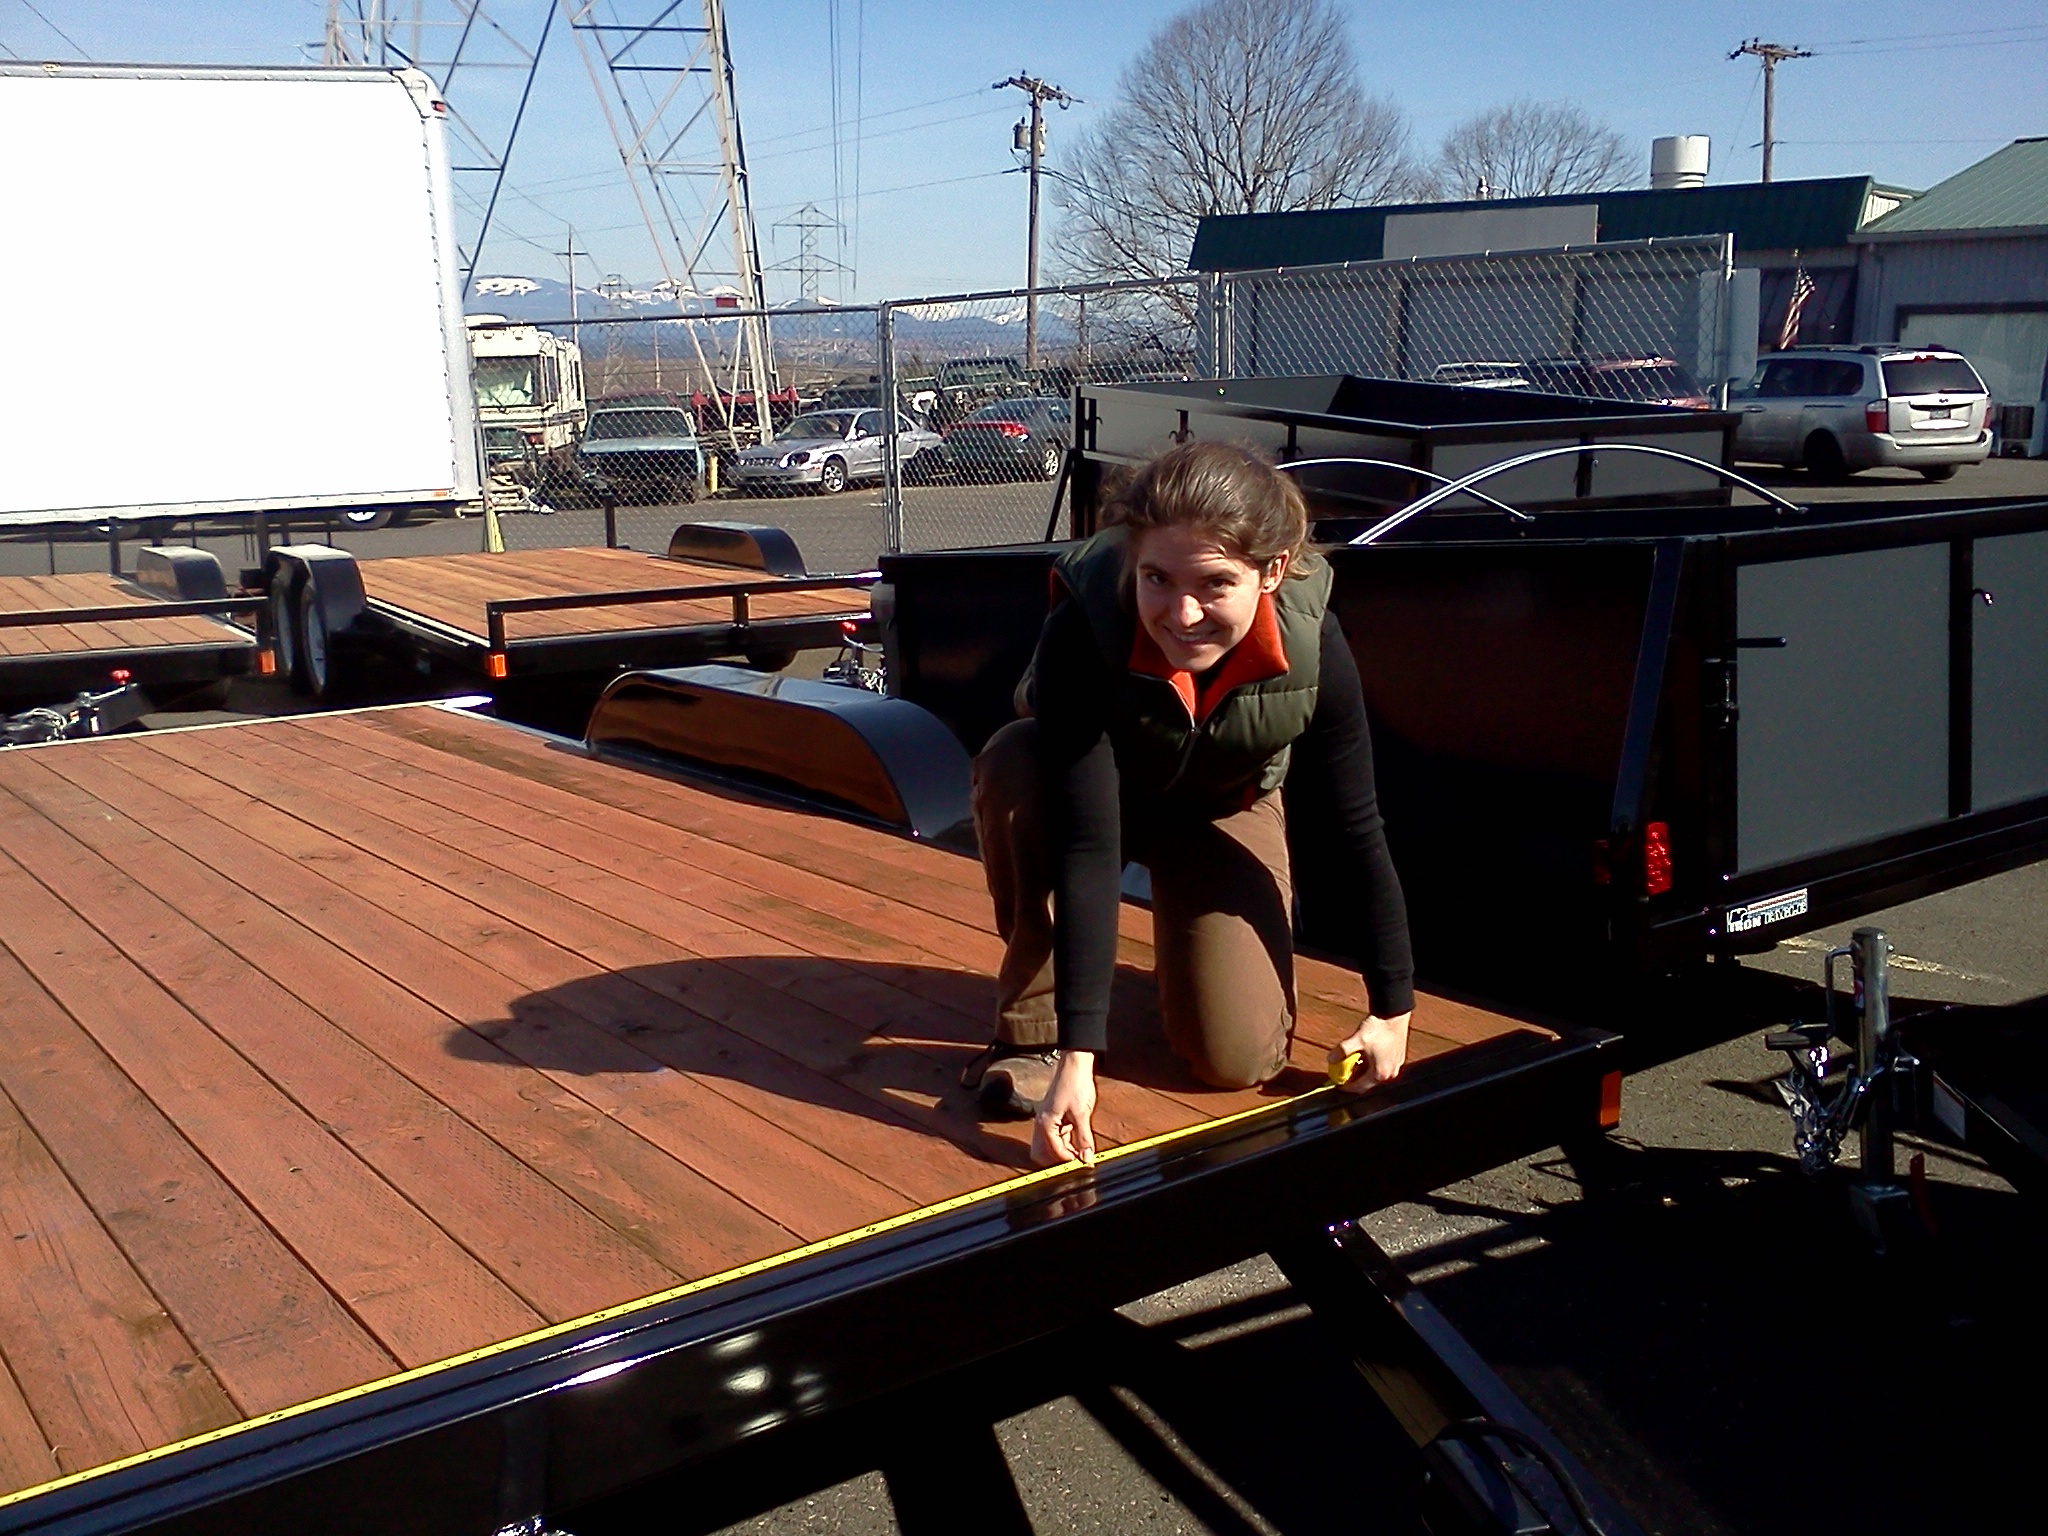
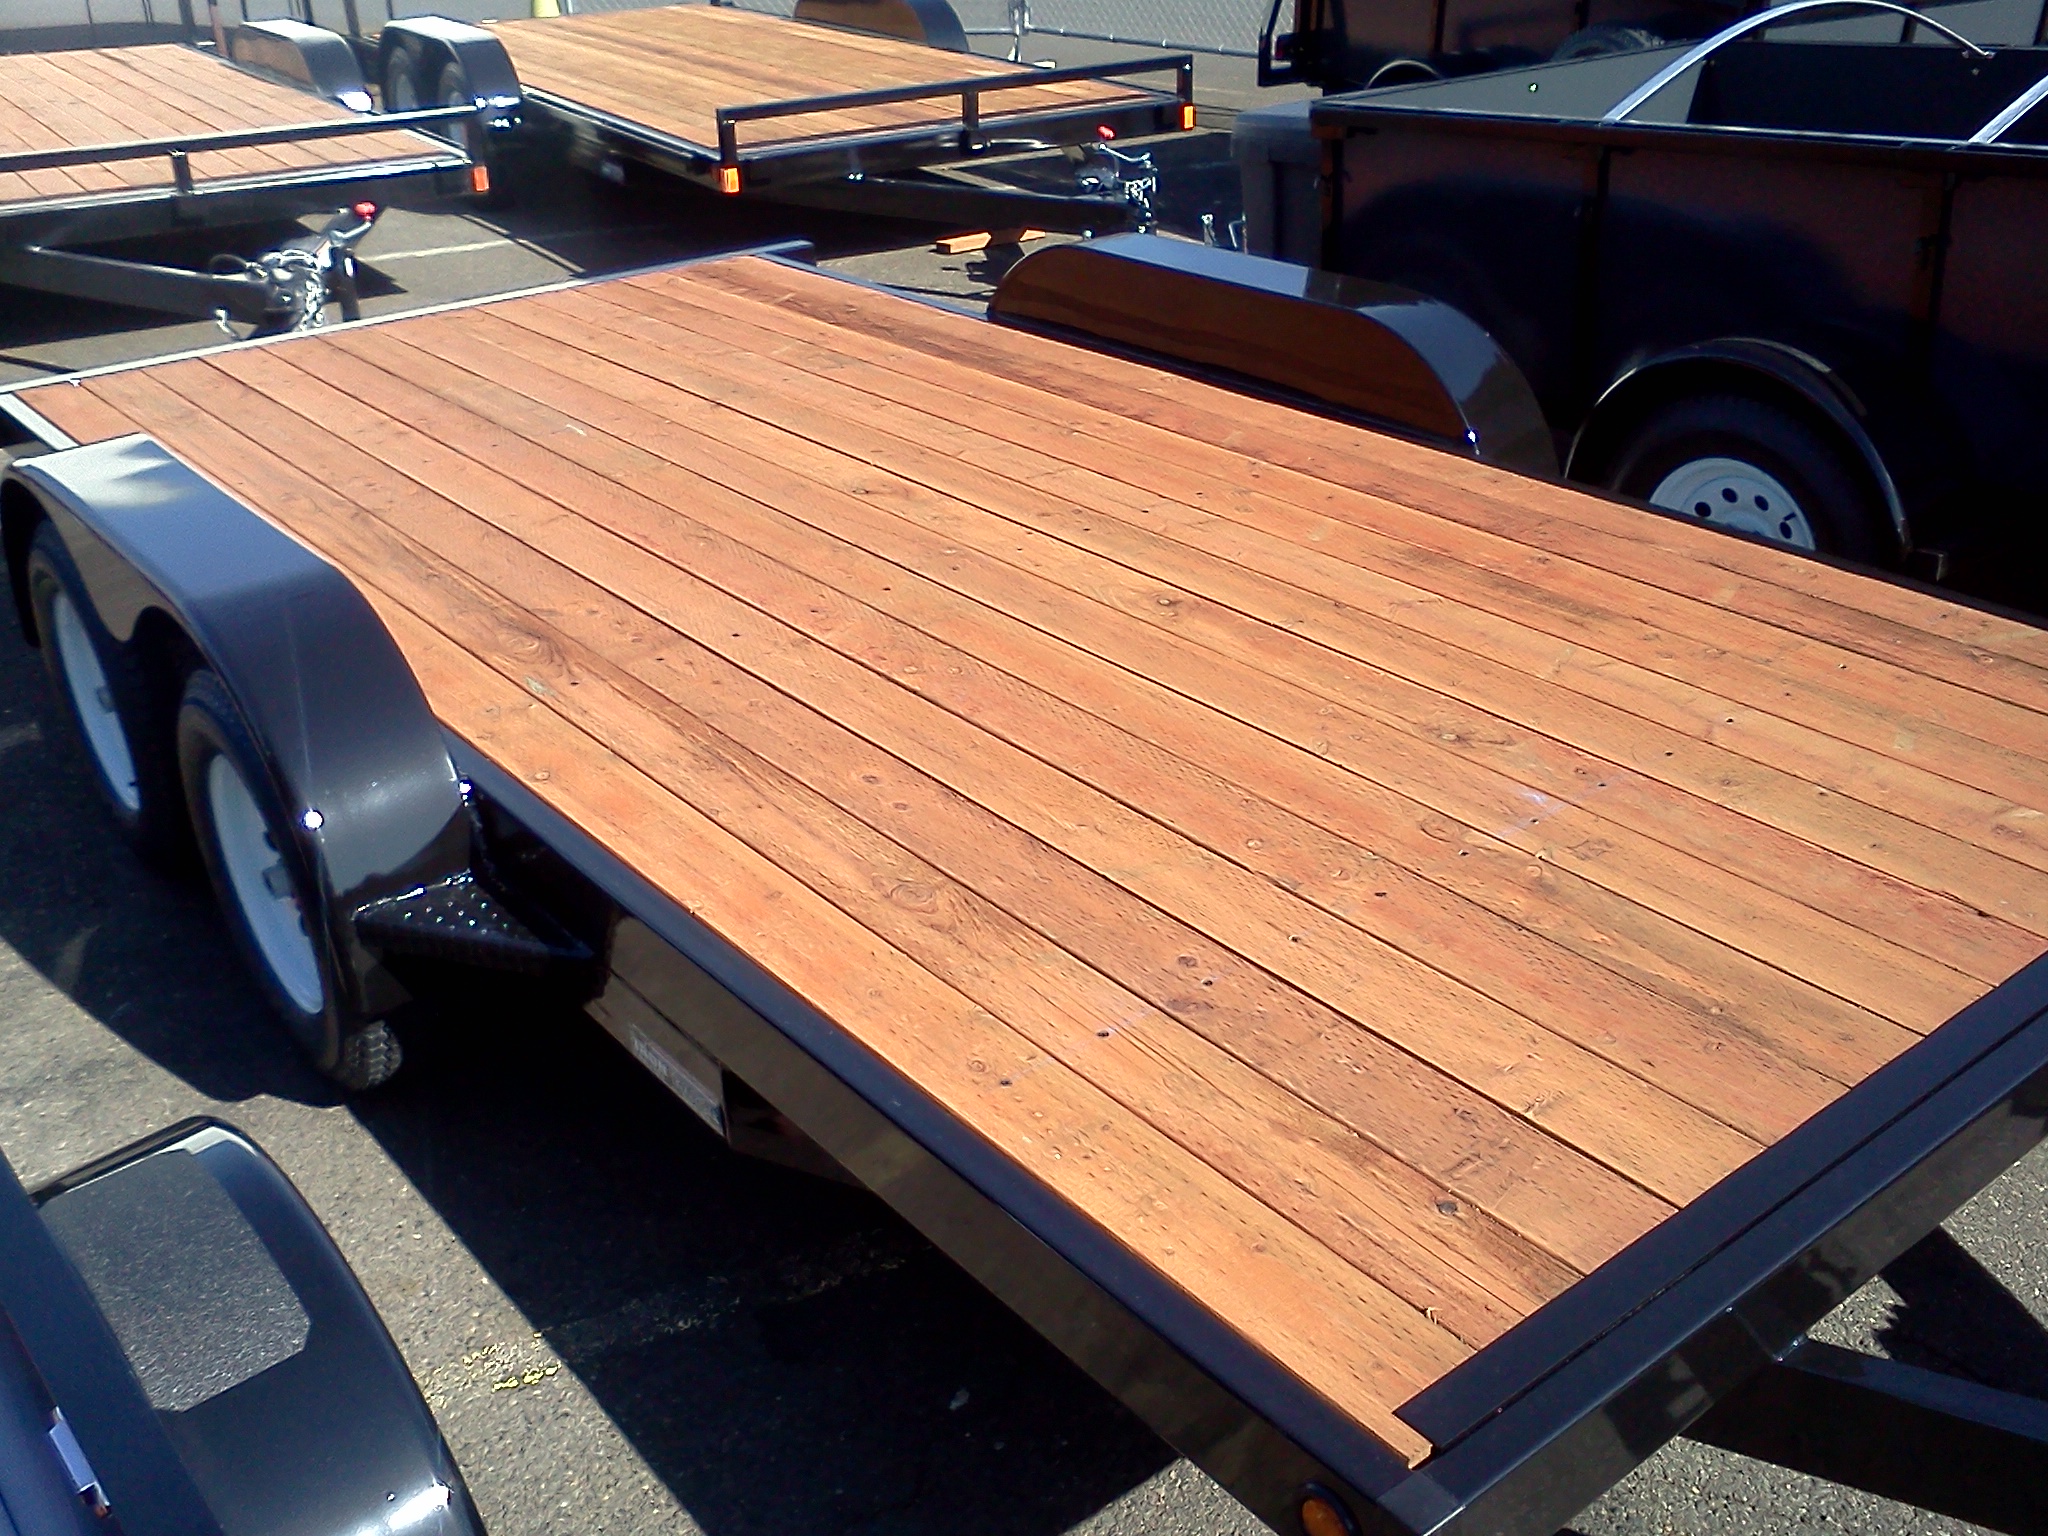
Trailer Measurement A funny thing happens when you start scheming about building a tiny house on wheels. At first it's just an increased awareness. You start noticing trailers all around you: parked in alleys, in driveways, along back roads, hauling loads down the highway. You find yourself checking them out and you wonder why trailers are suddenly everywhere. Then you realize they've been there all along, you just didn't properly appreciate them for their beautiful powder coating, their smooth following, and their heavy duty hauling capacity.

You begin investigating and learn terminology to describe them: deckover, beaver tail, goose neck, flatbed, car hauler, tandem axle, triple axle, dropped axle, gross vehicle weight, C channel, frame tubing, angle irons, diamond plate, hitch ball size, tongue length. By now you're clearly trailer obsessed. Eventually you start fantasizing about trailers, imagining a tiny house on every trailer you see. At this point you have trailer lust.

Trailer Lot

So when you crawl underneath a flatbed utility trailer at Don Johnson Trailer Sales to check out the axles, you'll have a sense of what to look for. And when you scramble back out because you hear footsteps you'll straighten up just as the sales fella walks over, his thumbs hooked over his belt. He'll say "What's a pretty lady like you doin' looking at car haulers? You oughta check out these horse trailers I got here." Without batting an eye you can reply, "Actually, I'm not a horse person. I'm interested in a 16-18 foot tandem axle flatbed utility trailer with GVW rating of 7000. This one's a beaut, but I'm interested in checking out your used trailers." He'll blink a few times, then crack a smile, and hold out his hand to introduce himself as Tom before taking you to the back of the lot to see the used models. Before long you're telling him about the tiny house project and he'll think you're even crazier than the horse people he usually sells trailers to. But he's intrigued, so he'll start keeping an eye out for you.

Tom will give you a call a few months later to tell you he's found a good one. By then you'll be living in a tiny house in another city so you'll tell him you're not currently in the market, but you're so glad he thought to tell you. He'll be a little incredulous that you're actually living in a tiny house on wheels so you'll send him a link to your blog and he'll write back, with the following note:

Just love your house. Very cool... just neat! May have to get me one of those. Have been looking over your site and have to say you are the most interesting person I think I've met since I started working here. Again, I really like your home. Sincerely, Tom

You'll be delighted that you have a committed and knowledgable trailer scout on your side. And you'll be proud that, thanks to you, there's one more used trailer salesman who is going to know what's what when someone else comes along wanting to build a tiny house on wheels.

***

As you might imagine, I was thoroughly impressed when I went to Iron Eagle Trailers a couple weeks ago with a friend who is building a tiny house and met Rob who already knew what's what when it comes to building trailers for tiny houses. My friend had been scouting Craigslist for a used trailer, but since she wanted to maximize the interior width of her tiny house, and we knew it would require extensive modification if she purchased a used trailer, she decided to go for a new custom model. Since the trailer is the foundation of a tiny house on wheels it is worthwhile to start out with a good sturdy foundation.

When we began describing the project Rob caught on right away. Turns out he's built trailers for Dee Williams and Katy Anderson of Portland Alternative Dwellings. The trailer design my friend came up with is a new version that will hopefully be a little lighter and a little simpler (therefore less expensive) than the "fatty" trailers Eagle Iron has built for tiny houses in the past. We're excited to see how well it works. Meanwhile, we're relying on the expertise of Dee, Katy, and a few friends who are builders as we draft up our plans. We've been pouring over Dee William's book Go House Go.

After sketching up a trailer diagram we made a trip to Iron Eagle Trailers this morning and worked with Rob to write up the order. The trailer should be ready in about two weeks, just in time for the tiny house wall raising.

Seeking: Everything but the Kitchen Sink

Kitchen Sink It seems the first thing one does when committing to build a tiny house is to buy the kitchen sink. Brittany decided to build the tiny house I'm currently living in while she was traveling. So she bought her beautiful sink in Mexico and brought it home as her carry-on item. A tiny sink is the only item I've purchased so far for the house I hope to build someday. It was just $5 at the Builder's ReSupply in Walla Walla and so cute I couldn't resist. John's antique hand pump was his first tiny house purchase and it guided the feel of his design. If this trend continues a friend of mine is going to have a happy and delightfully quirky tiny home this summer.

My friend Jane has been scheming about designing and building a tiny house. She recently asked if I'd help out and I grinned. I've been wanting to build a tiny house for two years now. But I wasn't quite ready to tackle the project on my own. My friend, meanwhile, has 1) no trepidation about big projects, 2) impressive capacity to envision built structures, 3) great follow-through and 4) connections to a veritable army of talented people.

So we've been brainstorming for a few weeks now. As the conversations became more detailed, I decided this would be a splendid Practicum Project to complete my Certificate in Sustainable Building & Design through Yestermorrow Design-Build School. I started pulling together the paperwork necessary for my proposal: programming questionnaire, timeline, draft budget, materials list, etc. Meanwhile, my friend contacted a couple of builders and started searching Craigslist for flatbed utility trailers.

Still, it wasn't until she showed me the kitchen sink yesterday (her first purchase for her tiny house) that I knew for sure that the project was a go. It's official. We're going to design and build a tiny house this spring!

I'll be blogging about the build as a way of cataloging what I've learned. I'm happy to answer questions about the house and progress. Stay tuned!

*Brittany's going to be taking her wee abode back to Olympia in June so that she can rent it out as a bed and breakfast to people who are considering building a tiny house. It's a great contribution to the movement. When people are able to try out the tiny tester they often realize how doable it is. If you're considering trying out The Little Life, get in touch with Brittany at bbyunker@gmail.com.