Building

My Chiller: A Natural Refrigerator

I've just created My Chiller - an electricity-free, propane-free, noise-free natural refrigeration system. And the best part is it only cost $7, so it was almost free-free!

Years ago I worked with a colleague who grew up in Astoria, OR. She explained to me that in addition to an icebox, her childhood home had a chiller. The chiller was a cabinet in the kitchen that had a screen on the exterior wall so it was open to the sea breezes. The walls and the door of the chiller were insulated, so this box was outside the building envelope. I’ve been fascinated by the concept of natural refrigeration ever since.

Other tiny house dwellers I know have lived without a refrigerator. Dee Wiliams uses a cooler and ice packs to keep her beer and half-and-half cool. Tammy and Logan decided they would live in their little house Smalltopia without a fridge, too, and they have explored How to Eat Yummy Without a Fridge. The first time I visited Tammy and Logan they showed me that they kept veggies in a hanging basket on the porch and their half-and-half in the gap between the kitchen window and the screen. Six months out of the year the outdoor air temperature in Portland, OR presents the same conditions as a refrigerator. Seeing Tammy and Logan’s set up convinced me that it’s rather silly in this part of the world to use electricity or propane to run a refrigerator when the outdoors present the ideal chilling conditions!

So last weekend I made a chiller of my own. My mini fridge was nearly empty when I returned from Family Time. I figured it was the perfect opportunity to defrost the freezer before plugging it back in and filling it back up. I packed my handful of chill items into my dishpan and set the dishpan on the porch while I was waiting for the ice to melt from the mini fridge. That night I hauled the fridge back in since it started to rain, but I realized the food was perfectly fine out there, so I covered my dishpan with my laundry basket to keep the critters from digging in. It seemed to work just fine so I decided it was time for a trip to the ReBuilding Center.

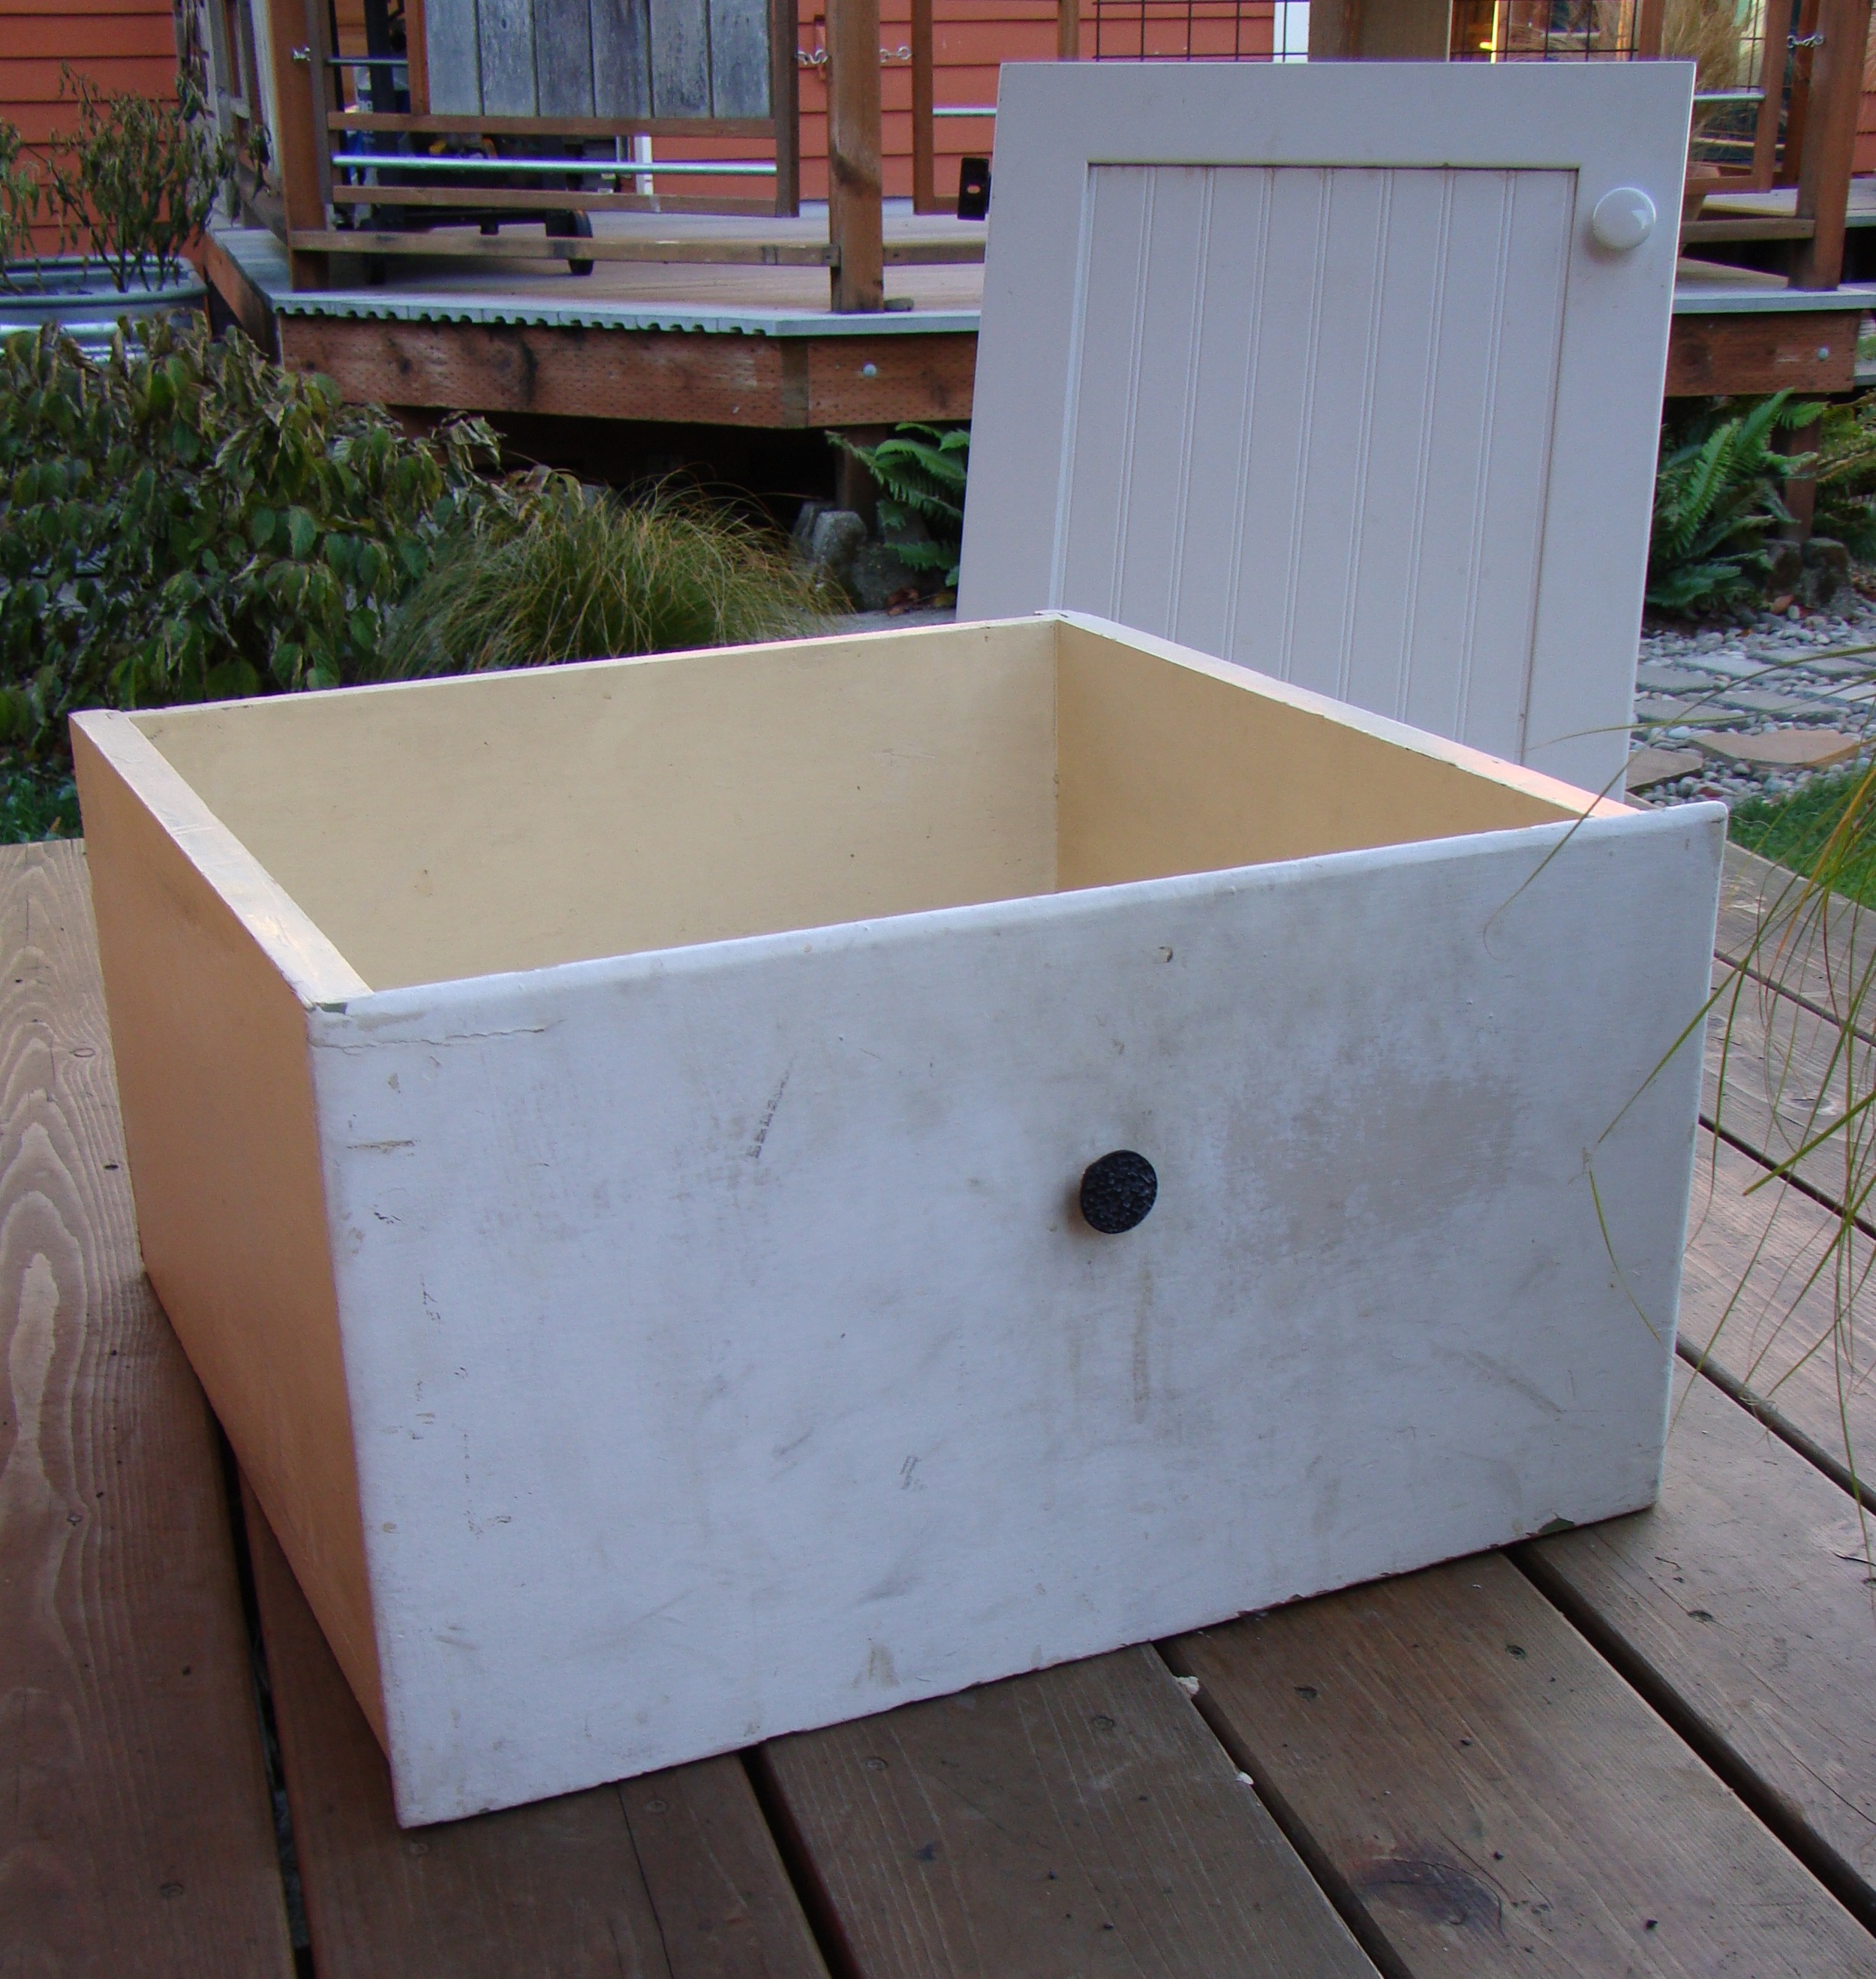
I found a drawer that was the size I wanted and a cabinet door that would fit with it (hinges and all!) The components put me back a whopping $7. At home I chiseled out a spot for the hinges, attached the cabinet door to the drawer, repositioned the handle, and drilled holes in the sides. I ran out of daylight at that point and I've been busy with other projects. But as soon as I can I'll sand it, paint it, and attach a pest screen that was repurposed from an old shelving unit.

I’ve been using my chiller for a week now and I’m perfectly happy with it. Yes, it’s slightly less convenient to step onto the porch to get food items out of the chiller than it was to grab them from the mini fridge in the kitchen. But considering that we’re talking about just a few feet of distance, no complaints here! I figure I should be able to use my chiller until about April when the temperature here starts to warm up again. So I have another 4 months of free refrigeration, thanks to living in a mild climate!

The added bonus is that since I’m not running my electric mini-fridge I was able to relocate my Envi Heater to the end of the kitchen cabinet. I Installed my Envi Heater on this wall back in October, but since the wall is shared with the fridge both were working too hard. So I relocated my heater to an exterior wall in early November. Once I shifted my food to the chiller a couple weeks ago I was able to put my heater back in end-of-kitchen-counter location, which means it’s on an interior wall and right at the edge of my loft. It's already cozier in my little house.

Luckily, the same time of year that I need to run the heater it's cool enough to chill my food outside. Now that's what I call elegant simplicity! Yet another reason I'm Giving Thanks for Tiny Living!

Tiny Chair Workshop at ADX in Portland, OR

On Saturday, October 26th I'll be teaching a Tiny Chair Workshop at ADX in Portland, OR. This is a Portland Alternative Dwellings workshop intended as a fun introduction to carpentry. Start small by building yourself a simple, comfortable tiny chair. In this 1-day workshop, you’ll learn how to safely use basic power and hand tools. You’ll head home with your very own tiny chair and the confidence to tackle the next project. The class has limited space, so sign up pronto on the ADX website!

"What is a tiny chair?" you ask. A tiny chair is a sweet little wooden and canvas chair that can be folded into itself and tucked away - or hung on the wall as a piece of art - how's that for turniture?! (I should also mention, as we head into the holiday season, that the chair would be a great gift for someone who is living light and the class itself would be a fun present for someone who is minimizing!)

"And where and what is this ADX place?" you wonder. ADX is a fabulous non-profit located in Portland's Central Eastside that is "building a community of thinkers and makers." They have a complete woodshop where we will be constructing our little chairs.

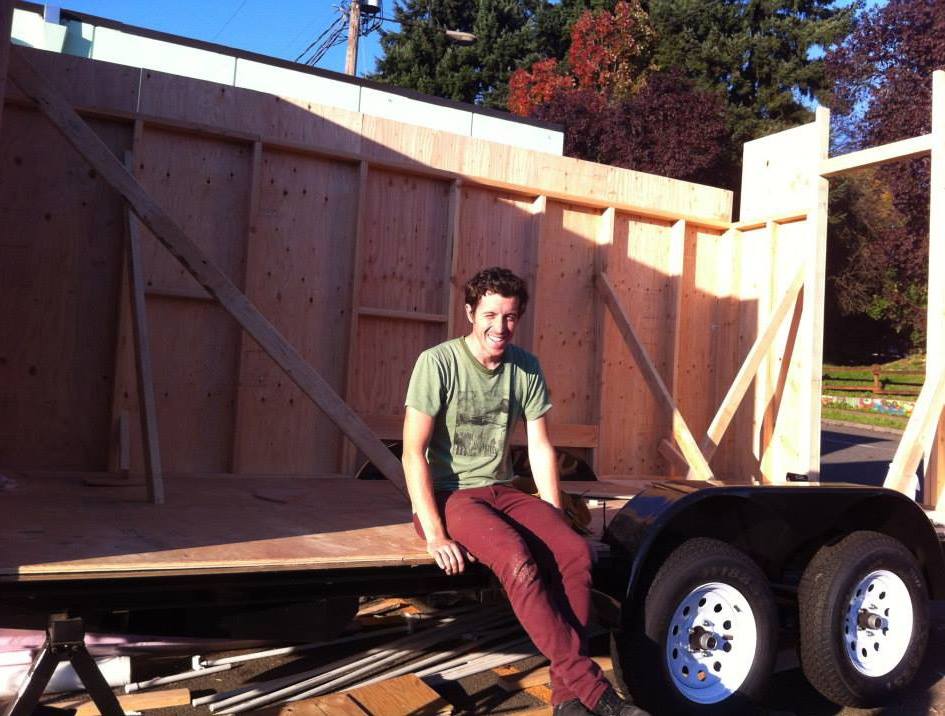
ADX is also where PAD Grad Ben is building his tiny house on wheels! You can follow along at Ben Builds a Tiny House. Ben attended the Pedalapalooza Tiny House Bike Tour and participated in the PAD building workshop for the Naj Haus Wall Raising. He's now raised the walls on his own little house. Once you've taken the Tiny Chair Workshop you'll be ready to lend a hand to Ben and other tiny house builders to get more hands-on experience before tackling your own tiny house build!

Day 12: Tiny House Presentations

Yesterday we wrapped up Yestermorrow's 2013 Tiny House Design-Build with final presentations from 13 brilliant students. (See more photos in the Day 12 Slideshow.)

It's amazing to think that less than two weeks ago we were perfect strangers, introducing ourselves and our partis. There were many different reasons people shared for selecting Yestermorrow's Tiny House Design-Build course and today we were able to watch as 13 people shared how their thinking has changed as they've had the opportunity to learn about tiny house design considerations and build the shell of a tiny house on wheels.

Today we saw clever space-efficient design solutions presented through beautiful drawings and detailed models. We got to learn about:

  • Cate's gypsy wagon with an arched roof, full extension drawers, leaded glass windows, and a multi-purpose mud room

  • Julien's tiny home on wheels for a family of four, complete with a cow catcher, a movie screen, an electronic keyboard, and a set of brilliant cube turniture that serves as seats, storage, and a guest bed
  • Amanda's backyard retreat, nestled into an edible landscape with a private outdoor seating area and sunset views
  • Ben's cabin in the woods of the Olympic Peninsula with a great porch for sitting and a woodshop for projects that is as elegantly simple as the Stanley hand planer that inspired it
  • Annika's little backpack-inspired house with a place for everything and so much more: a garage door opening to a courtyard, a greenhouse for food production and passive solar heat gain, a cozy loft, and easy access to fresh cookies when one walks in the front door
  • Apayo's boat-shaped guest house in an incredible landscape, which serves as a canvas for her ocean-insipred art and a retreat for her visitors

  • Oliver's multi-story house with a top-floor kitchen equipped with a dumbwaiter and windows that march up the corner of the house in step with the spiral staircase
  • Laura's tiny house on wheels with a clerestory providing light for the loft and a multi-functional furniture to maximize the space
  • Evan's little house on wheels with a clever central storage solution to ensure that everything has its place so that the house fits Evan juuust right
  • Whitney's tiny house with a soaring garage door that enables the house to serve her differently for each of Vermont's 6 seasons (spring, summer, foliage season, stick season, winter, and mud season)
  • Julie's Japanese-teahouse-inspired mobile home, complete with tatami mats, shoji screens, a table that serves as artwork, and a circular window
  • OJ's mobile design-build classroom that deploys like the tape measure that inspired it, opening to create more working space for projects while also serving as a crash pad for the instructor while traveling

  • Jonathan's not-so-tiny but super cool home in the clearing with 27 instances of the magical Number 27 hidden amongst stained glass windows, a stone fireplace, a secret passageway, a breakfast nook, and several cozy sitting spots

Everyone should be immensely proud of the work they've produced. Their ideas, insight, and imagination have been thoroughly inspiring. I can't wait to see some of these little houses become a reality in the next couple years. Three cheers for Yestermorrow's 2013 Tiny House Design-Build course!

Day 11: Roof Sheathing & Drawing Sets

Day 11 of Yestermorrow's Tiny House Design-Build course was our last building day since presentations will take place all day today. So most of us worked in the Hanger this morning and a handful of us were back there this afternoon so that we could finish up as much of the roof sheathing as possible. Meanwhile, the studio was abuzz with model making and drawing as everyone refined their work for their final presentations. (See more photos in the Day 11 Slideshow.)

Down in the Hanger, Laura and Lizabeth worked out the sheathing for the gable ends and got them buttoned up. Whitney laid the floor of the storage loft. OJ, Laura, and Annika attached the hurricane ties which connect the rafters to the walls. Cate cut additional sheathing and did a happy dance when Patti complained she couldn't figure out which side was the factory edge. Whitney, Patti, and I clambered around on the scaffolding, attaching sheathing to the rafters and getting those last rake rafters for the dormers secured in place.

With two weeks of working together under our (tool) belts, it was awesome to see how productive we were all able to be! Hooray for teamwork! At the end of the work day we all gathered up for a group photo.

Back in the studio in the evening everyone hunkered down at their drawing tables to pull their work together. It's been incredible watching everyone's designs evolve and there are so many downright brilliant ideas I am completely inspired all over again! As people piled up their drawings in neat little stacks and switched off their desk lamps they found their way down to the bonfire where we munched on goldfish crackers and burned the scrap wood we'd produced over the past two weeks of building.

I can't wait to see the presentations today. The anticipation makes this feel like Christmas morning!

Day 10: A Sprig for the Last Rafter

Most of Day 10 of Yestermorrow's Tiny House Design-Build course was dedicated to building so that we could get the rest of the roof rafters up. However, there were also a group of students who hunkered down in the studio to get farther along on their models and drawing sets. I enjoyed spending time in both places as the work progresses. (See more photos in the Day 10 Slideshow.)

Because the house has dormers in the center there are two different pitches. So we created rafters with two different slopes. Both sets of rafters meet at the ridge beam and rest on the walls (at two different heights) with bird's mouth cuts. The rake rafters for the dormers will need to wait until we've sheathed the roof sections on either side, but the house is definitely taking shape.

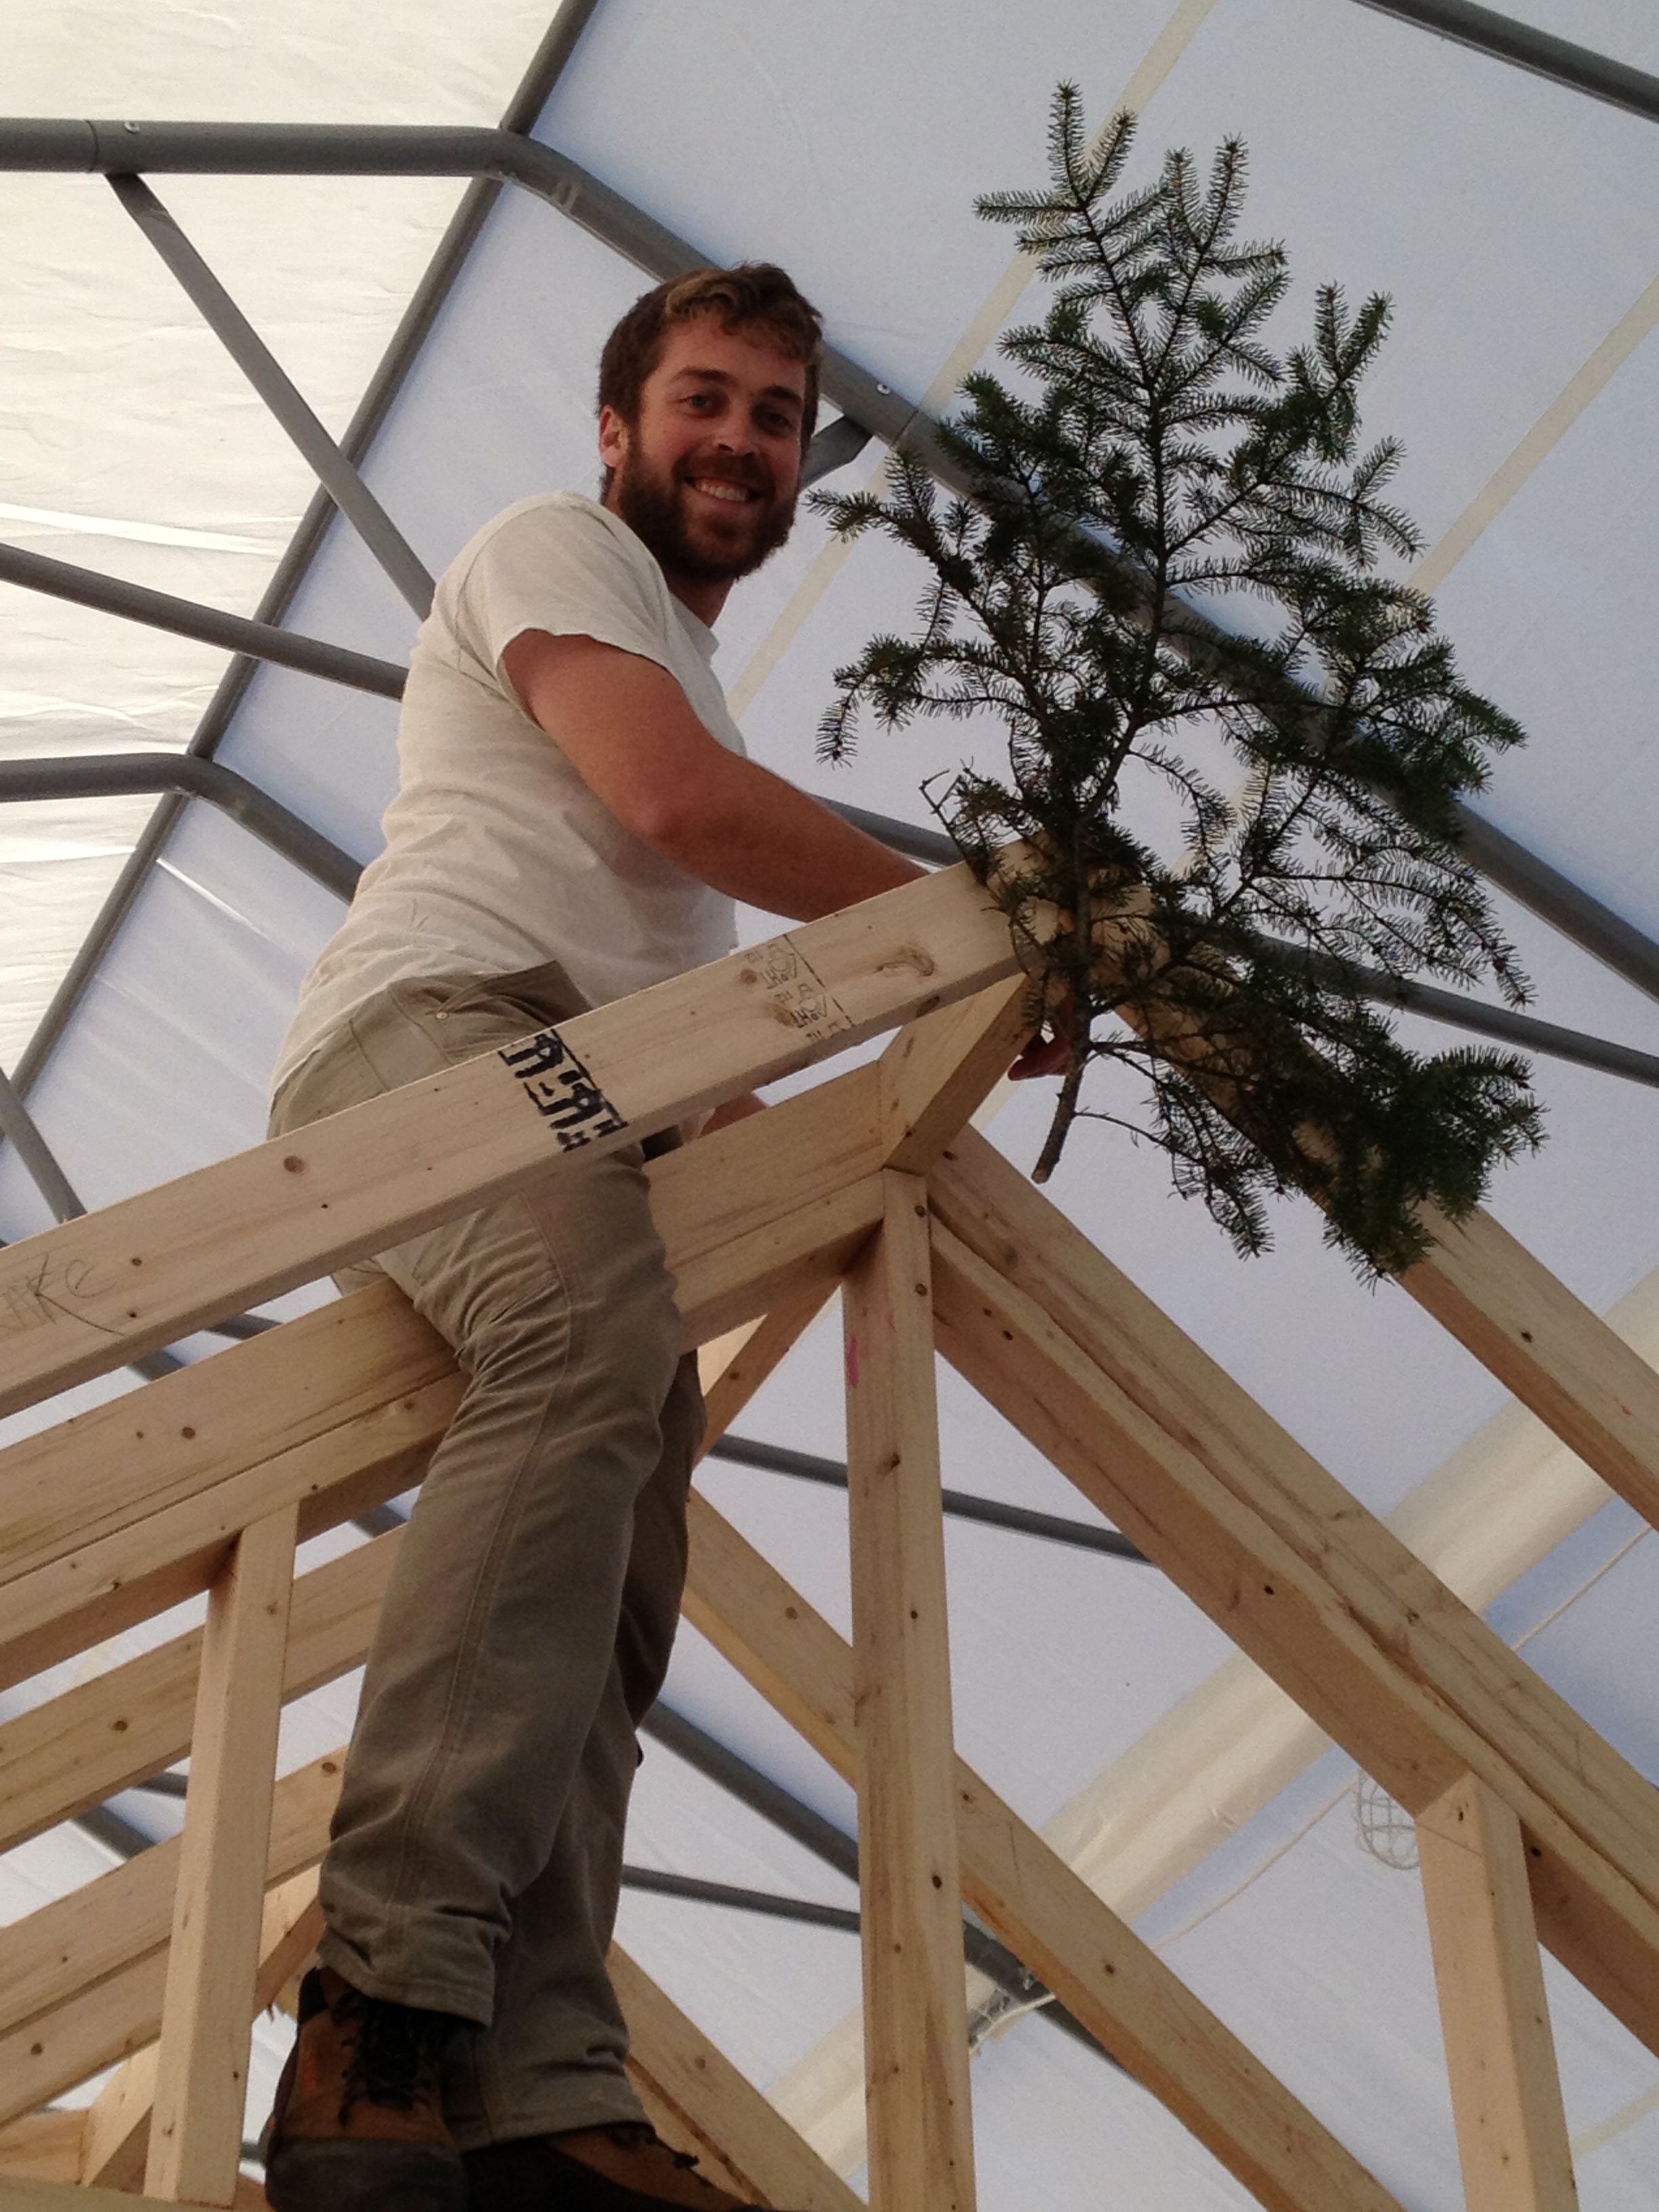
We managed to get the last of the common rafters up before supper and we had a little "topping out" celebration as we attached a sprig to it. Lizabeth explained that in the Druidic tradition a sprig was attached to the last rafter as a thank you to the trees for contributing to the house. This tradition has continued among timberframers here in America and it continues now on Day's little house. Hooray!

Day 9: Rafters, Ridge Beams & Jam Night

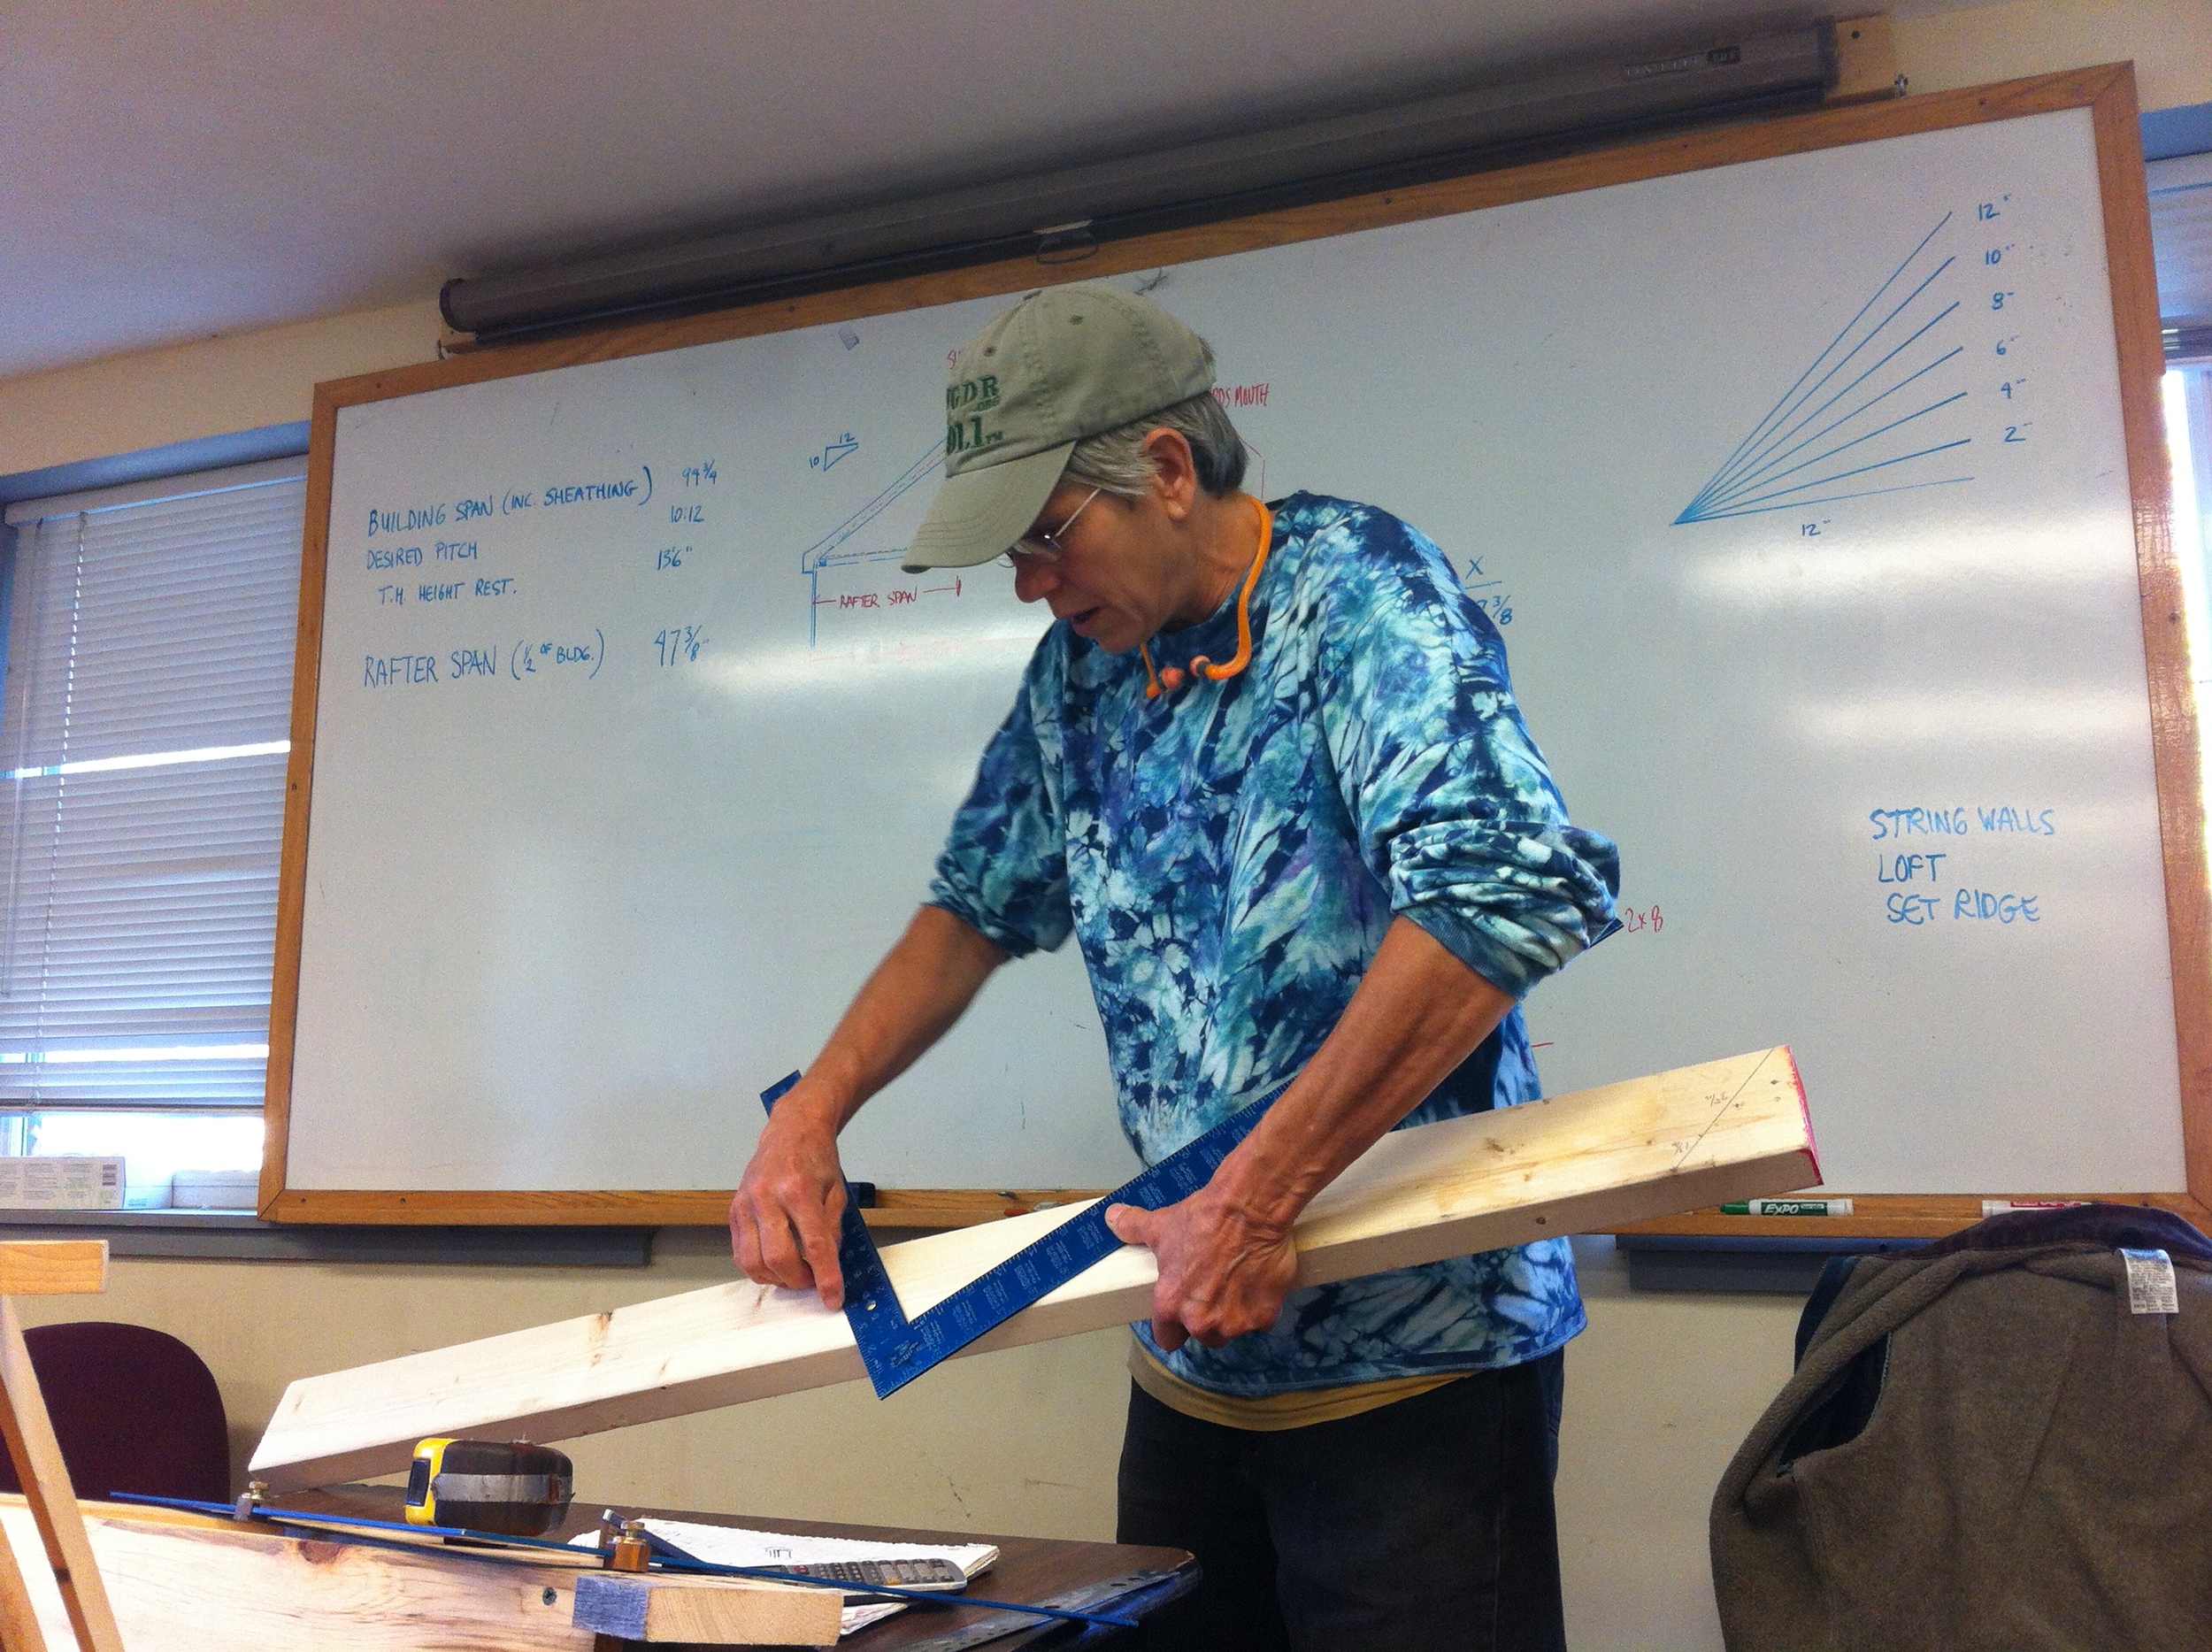
Patti started Day 9 of Yestermorrow's Tiny House Design-Build course with a presentation on roof framing. The tiny house on wheels we are building includes dormers in the center of the building, so we are cutting our rafters at two different pitches. Patti walked everyone through the vocabulary and structural mechanics of roof framing with models and diagrams. Then she demonstrated how to use a framing square to make bird's mouth cuts on the rafters. (See more photos in the Day 9 Slideshow.)


Down at the hanger we split into teams so we could square up the walls, build supports for the ridge beam, sheathe around the wheel walls, and begin cutting our rafters. The morning flew by and soon it was lunchtime. (I have resisted bragging about the incredible whole foods meal plan here, but let me assure you that the food is scrumptious at every meal!) I took the afternoon off from construction to have a nap and check in with Yestermorrow's office team. By the time I went down to the hanger the ridge beam was in place and most of the rafters were already up!

Since we only have two more days of design work the evening was devoted to studio time so everyone could work on their tiny house designs. However, most of them took breaks to join the festivities in Yestermorrow's dining room. It was a crisp evening, perfect for a jam night in the kitchen, accompanied by Cillian's famous popcorn and the ever-popular Heady Topper from local brewery, The Alchemist. The brew was courtesy of the tiny home's owner Day Benedict, who is a former Yestermorrow Intern. He came to meet everyone and see his little house. It was fun to get to know him and learn more about his plans for the tiny house. Between Dave Warren, Yestermorrow's Facilities Manager, and my co-instructor Patti we had a stand up bass and two guitars. We scrounged up some copies of Rise Up Singing and most of us sang along at some point to some good old folk songs (including one of my favorites: I'm My Own Grandpa). What a fun night!

Day 6: Sheathing, Energy & Systems, Wall Raising

On Day 6 of Yestermorrow's Tiny House Design-Build we began sheathing the walls with CDX plywood. We're sheathing the walls flat so that the plywood creates sheer panels, which helps to keep the walls square while we install them. (See more photos in the Day 6 Slideshow.)

Since the long walls are being built in 3 sections and we have plenty of brute strength amongst the 16 of us, the panels won't be too heavy to lift into place even once they are sheathed. We decided to use 3/8" plywood to save weight since other tiny housers have done this. Unfortunately, the plywood has more warps and bows than we'd like to see so most of us have decided we'd rather use 1/2" for our little homes. (It may be that 3/8" plywood is higher quality on the Best Coast and this is another East Coast - West Coast difference.)

Now that we have the trailer level we can use it as a work surface. Our wall sheathing process involves snapping a straight line 3 1/2" from the edge of the trailer, toenailing the bottom plate of the wall to the subfloor along this line, squaring up the wall, and attaching the plywood, using the glue and screw method. Because this little house is not built down into the trailer frame we are running our plywood an extra 4 3/4" below the bottom plate so that it will cover the floor system (3/4" AvanTech subfloor, 3 1/2" pressure treated joists, and 1/2" pressure treated undercarriage). We also cut out most of the windows, using a circular saw to make plunge cuts. The windows we didn't manage to get cut out before it was time for wall raising will need to be finished with a reciprocating saw.

We got the walls almost ready to raise in the morning and after lunch I did a presentation on building science basics, energy, and systems. Afterwards we did our first wall raising and got three of the wall sections up. It's always such a thrill to see the first walls go up!

Thankfully, we set up the schedule with a 24 hour break from Saturday evening to Sunday evening, which will be a good chance for everyone to recharge. Perfect for a Saturday evening bonfire and a sing-along with a few (handmade!) instruments. It was an action-packed week and we've got another one ahead of us!

Day 5: Two Tiny Tours, Floor Insulation, Installing Subfloor

First thing on the docket for Day 5 of Yestermorrow's Tiny House Design-Build course was a field trip to Montpelier to see two little houses. (See all the photos in the Day 5 Slideshow.)

The first was a tiny house on wheels that was constructed by Yestermorrow's first 2-week Tiny House Design-Build class two years ago. This little house was designed as a collaboration between the clients, Susan and Emily, and our co-instructor Paul Hanke. It features a bay window, a set of dormers in the sleeping loft, an alcohol cooktop, and a commercial sink for a bathtub. Life got busy and the homeowners are still working on the house. So they haven't moved in yet, but they're well on their way. They've made themselves a cozy home, sweet home and I look forward to seeing it again on my next trip to Vermont in March for the Less is More course.

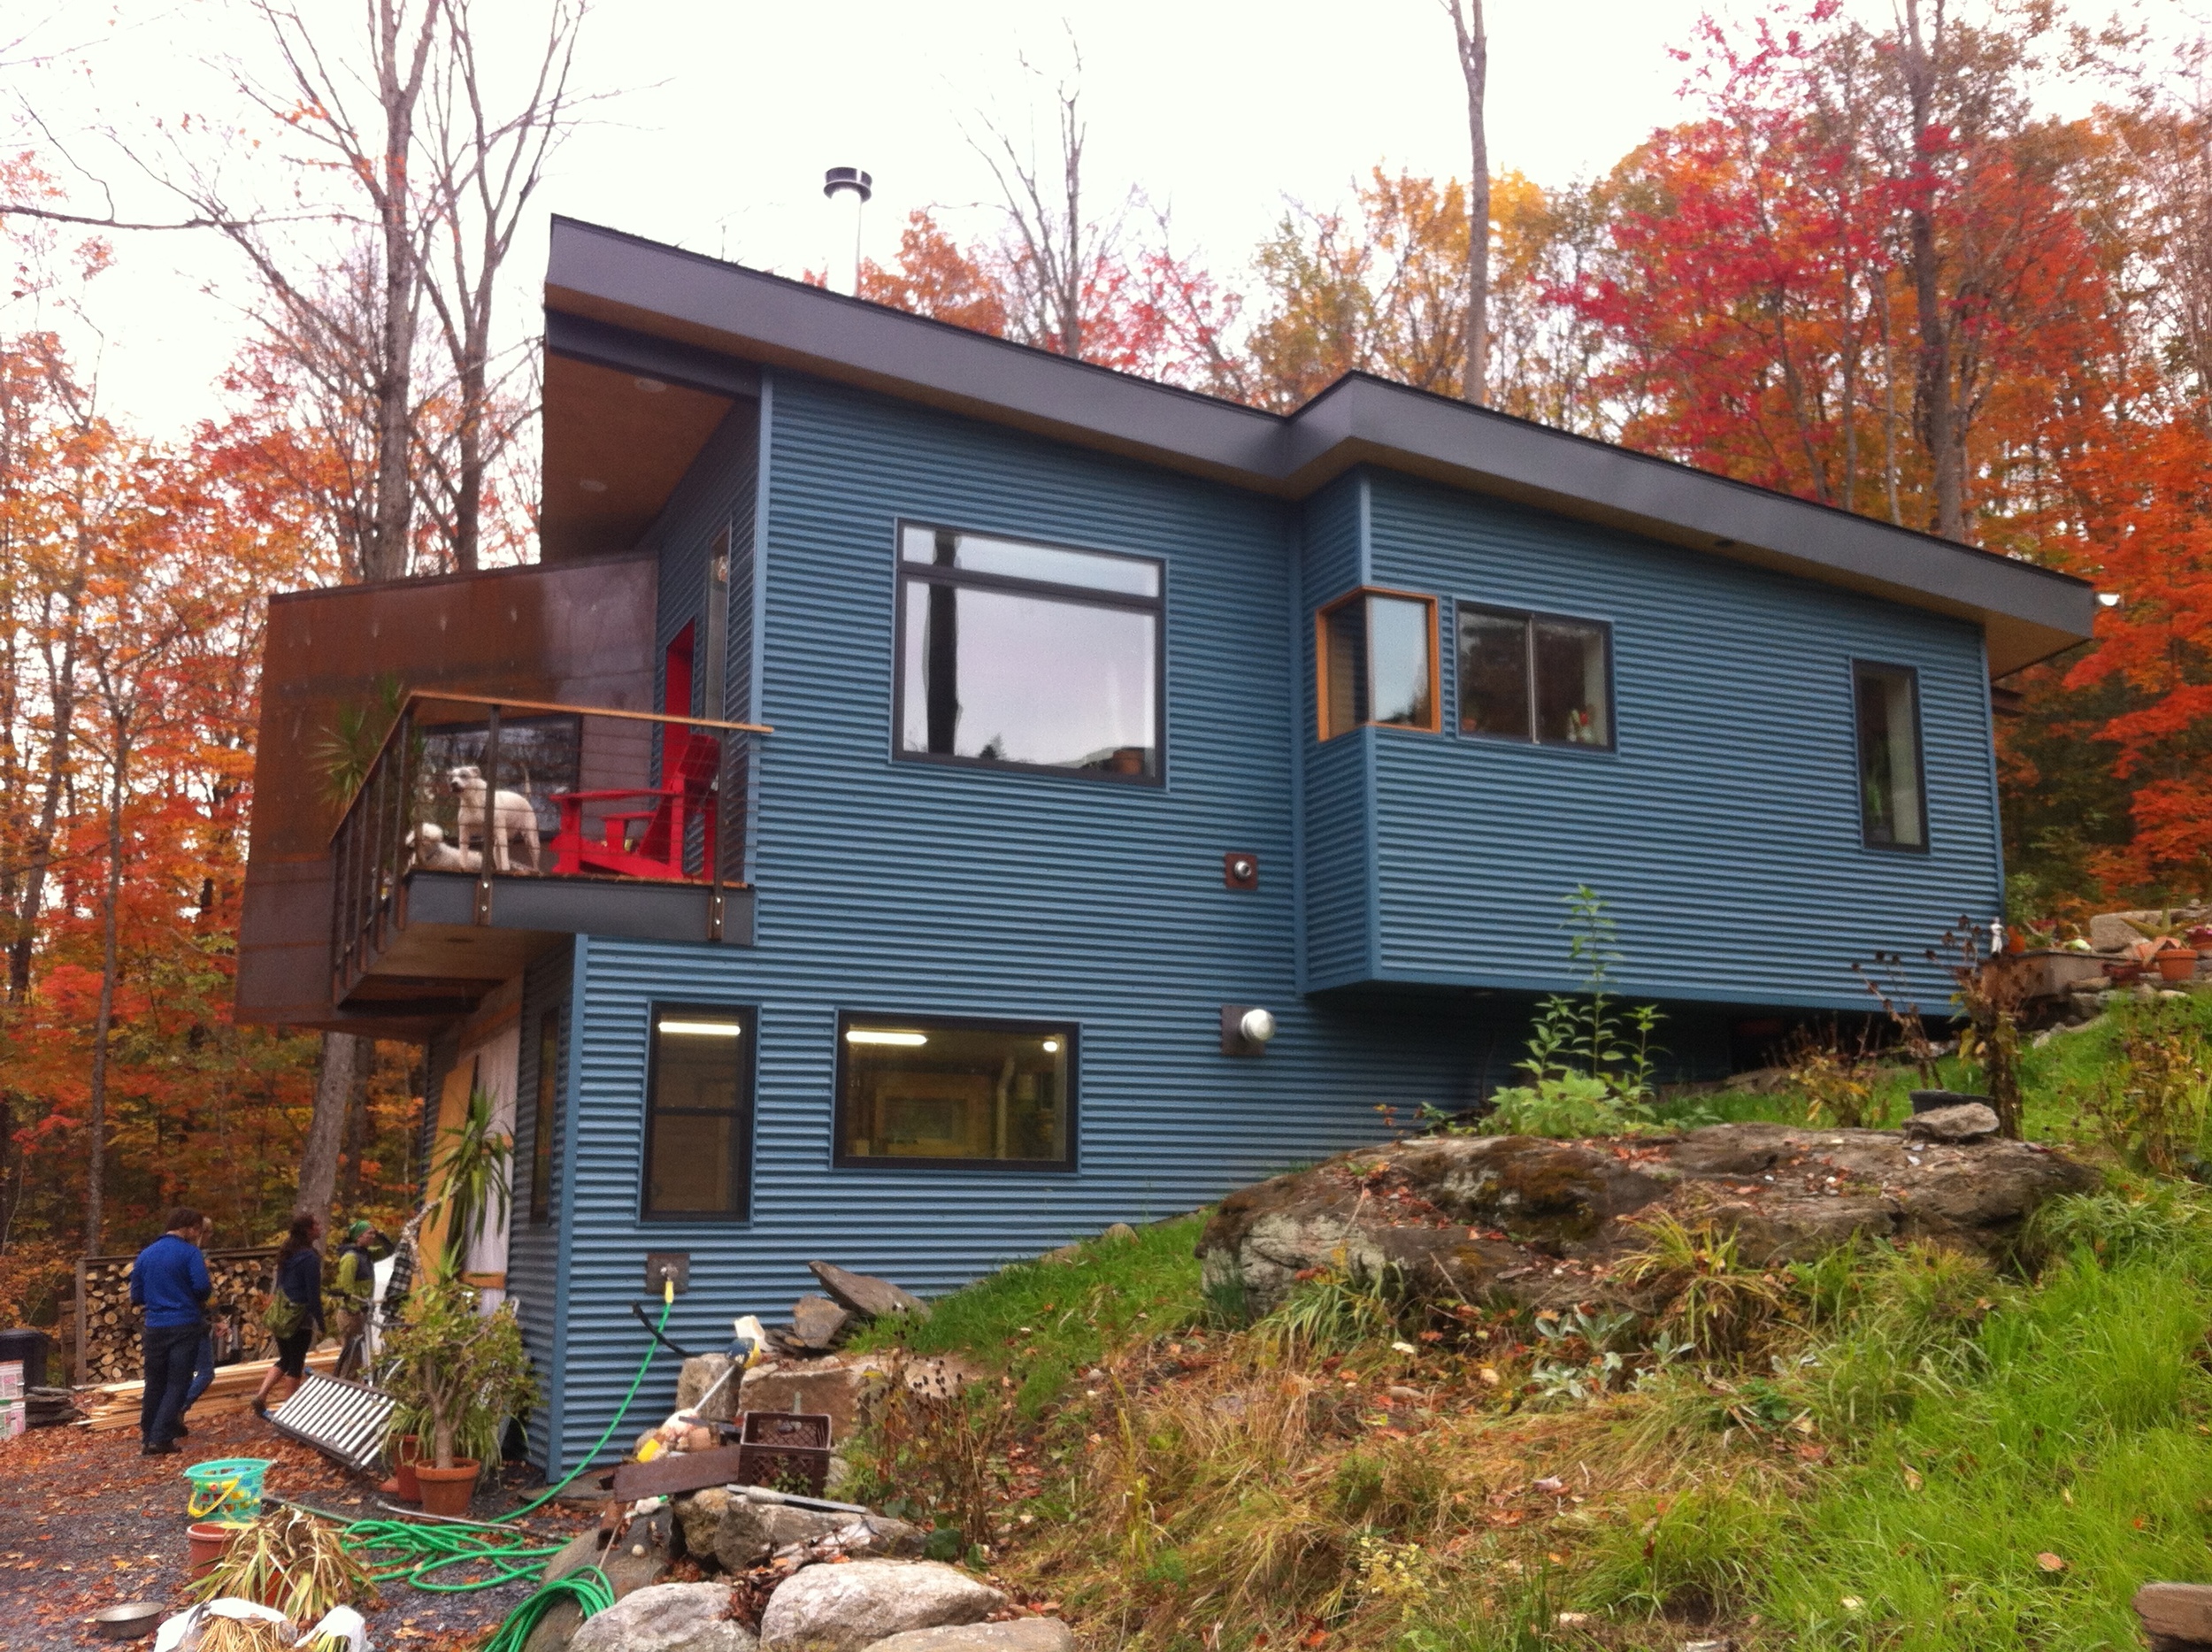
The second field trip was to see Ben Cheney's home, which was built by Yestermorrow's Semester Program last year. Ben's 700 square foot 1-bedroom house with a shop in the basement isn't a tiny house, but it is a small house that uses space creatively. It's setting is also spectacular, especially this time of year, with the blue corrugated siding contrasting nicely with the autumn leaves.

We had a great time asking Ben questions about his design decisions - and the cool gadgets he has in his home. If anyone can identify the mysterious unidentified object in the Day 5 Slideshow, please do let us know what it is!

In the afternoon we insulated the floor box of the trailer with rigid foam and sealed up the edges with low expansion spray foam. The floor box is 3 1/2" tall, so we inserted one sheet of 2" rigid foam and sealed the edges then added a sheet of 1 1/2" and sprayed the edges around it. Afterwards we installed the 3/4" subfloor. The AvanTech decking has the screw pattern stamped on it, which makes it especially easy to get it done in a snap. Tomorrow we plan to raise the first walls and it will start to feel like a real house. Stay tuned!

As usual, we had presentations and studio time in the evening after supper. It's been great to see the designs evolve, especially now that several of them are taking shape in the 3rd dimension with models and sections.

Day 4: Wall Framing, Drawing to Scale, A Chat with Dee

We started out Day 4 of Yestermorrow's Tiny House Design-Build down at the Hanger where we worked on framing up the long walls of the house and preparing the trailer for the floor box system. After lunch we went right back to it and we finished out the work day with the two long walls almost finished. (See more photos in the Day 4 Slideshow.)

After supper we had a Skype chat with Dee Williams. Everyone had a chance to introduce herself or himself and tell a little about her or his project. Then Dee shared her tiny house story and some lessons learned from living in a little house for the past nine years.

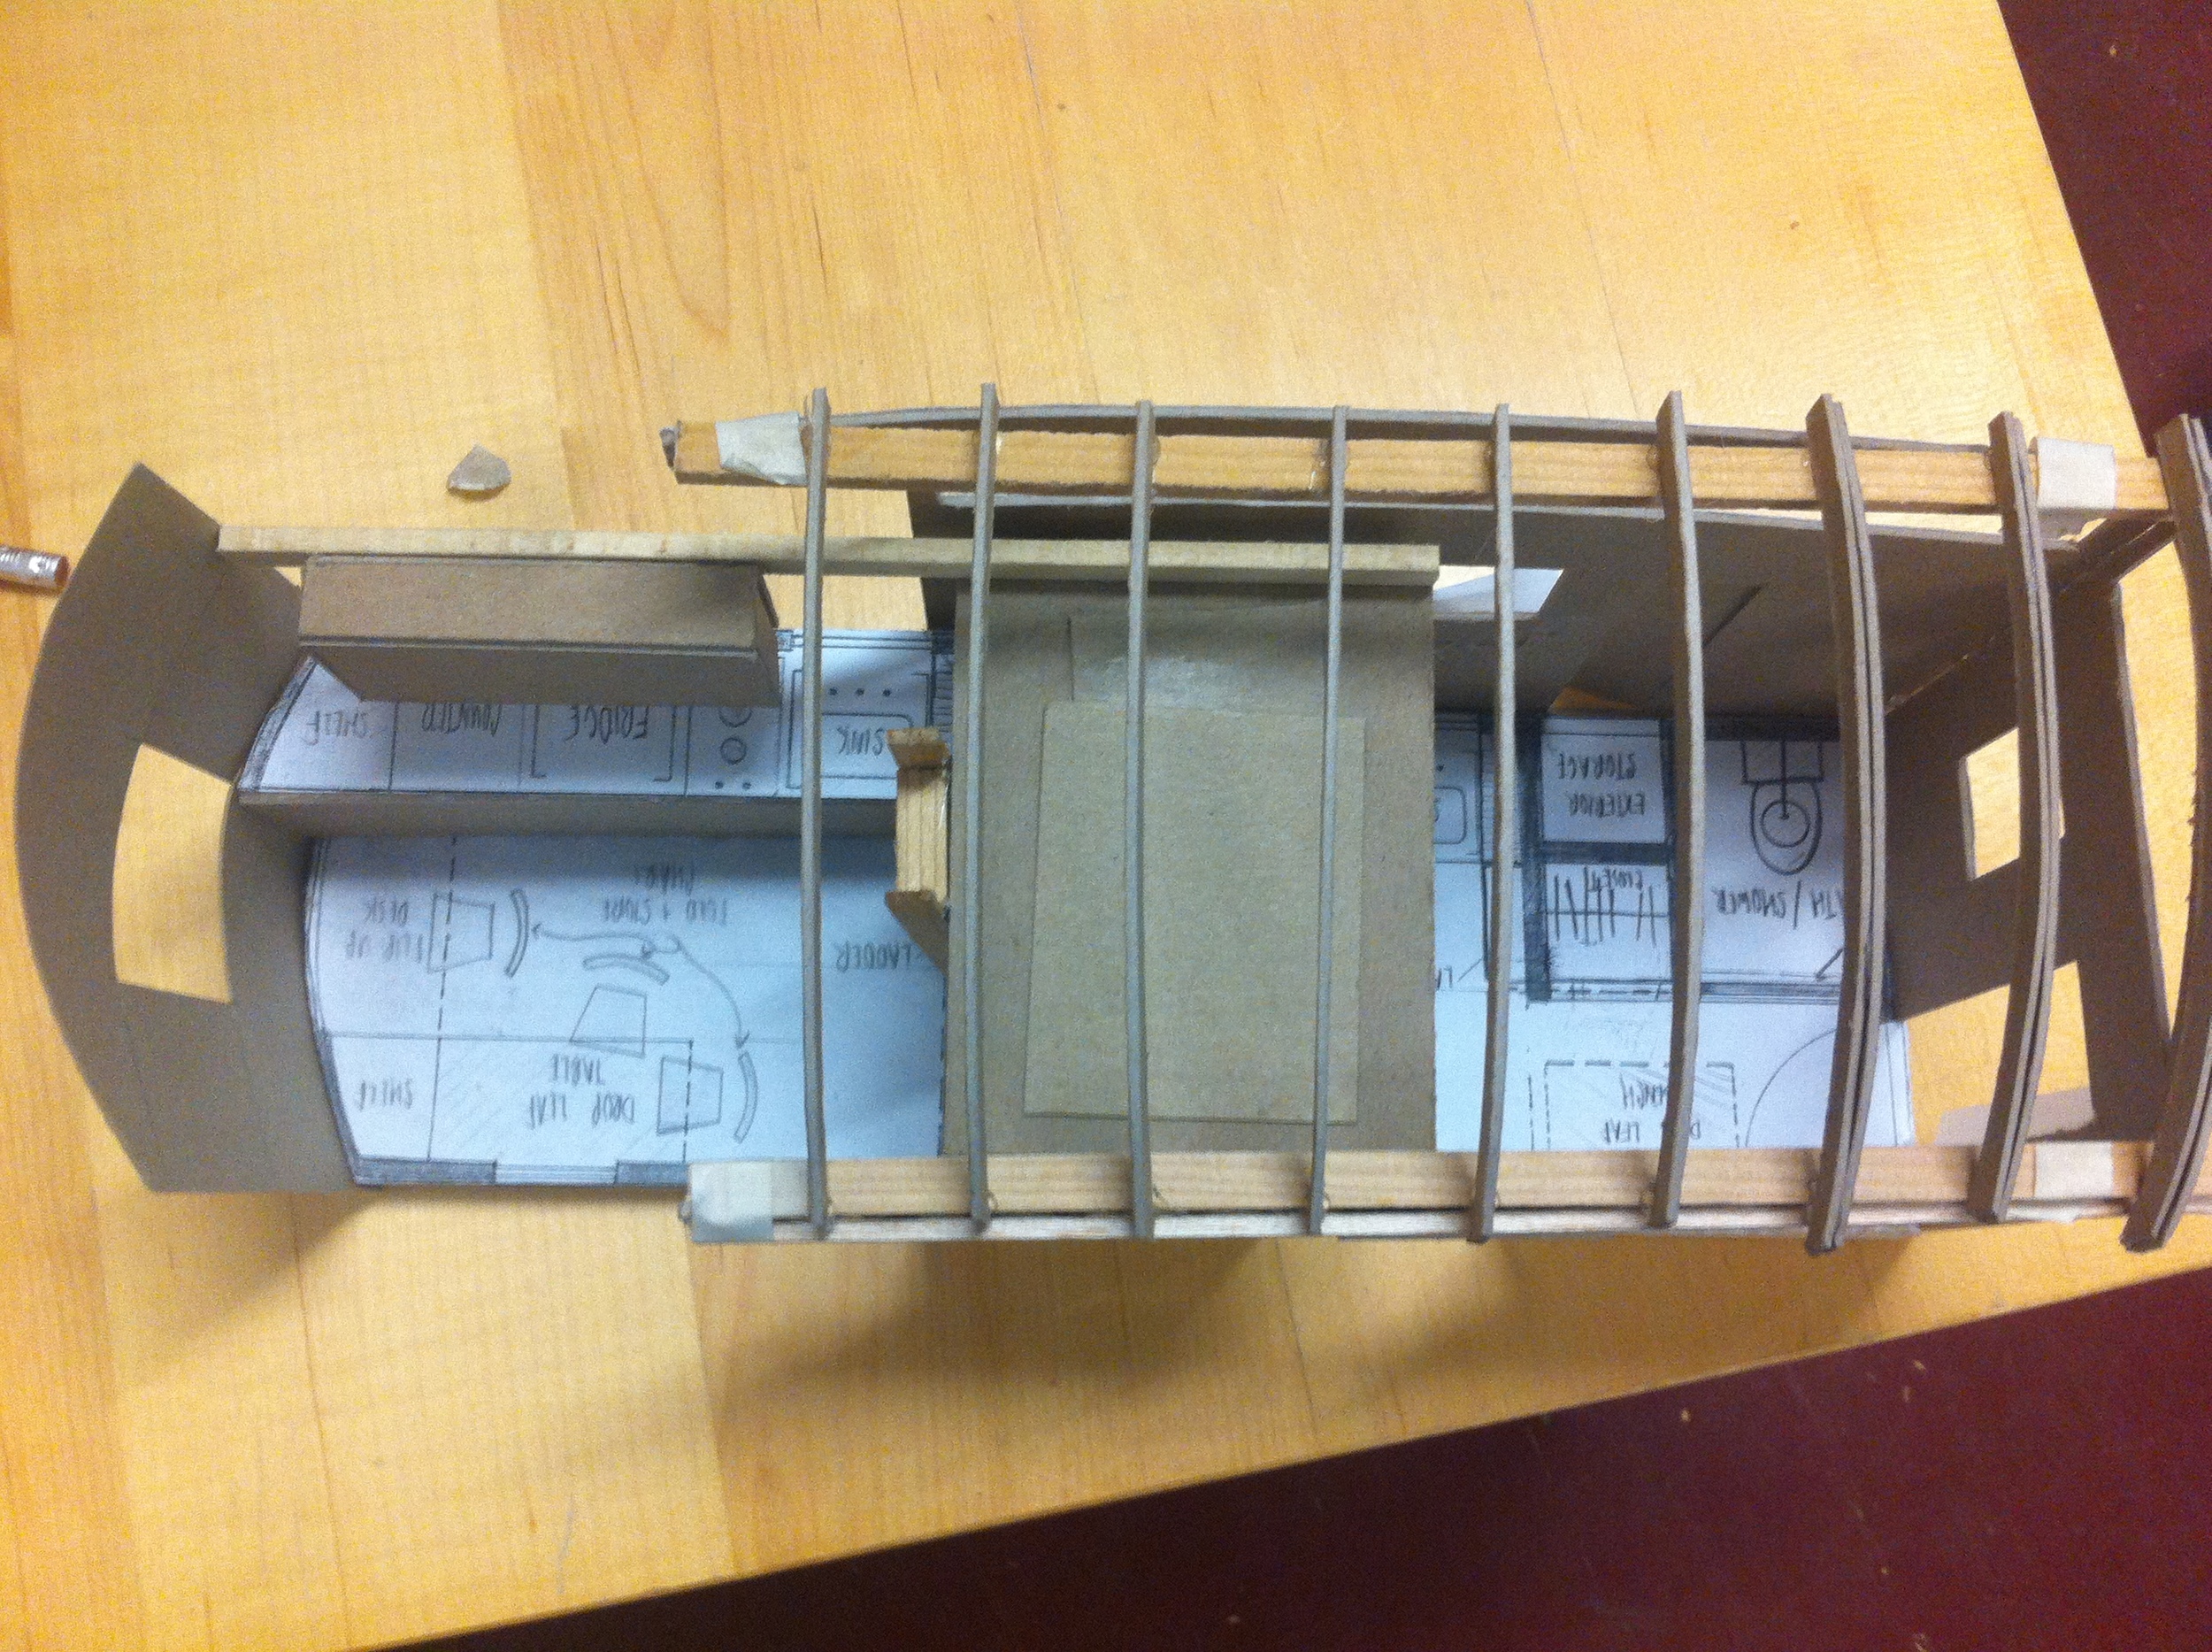
Afterwards students received their drafting kits and Paul gave a drafting lesson so they could put their new tools to good use. The rest of the evening was spent getting a sense of what fits and how it feels with the help of architectural scales and massing models. How fun to see these projects evolve!

Day 3: Interiors, Another Tiny Field Trip, Site Maps & Graph Paper

We started Day 3 of Yestermorrow's Tiny House Design-Build with my presentation about tiny house interior design considerations with dozens of tiny house photos I've collected over the past couple years, including John's Tiny House Truck, Brittany's Bayside Bungalow, Chris & Malissa's Tiny Tack House, Gina's Sweet Pea, and many more. We've created a shared inspiration folder for the class so that everyone can add their favorite interior design ideas. (See more photos in the Day 3 Slideshow.)


Then we headed down the road on another tiny field trip to see a guest cabin on the bend of the Mad River. The setting for this little house is spectacular, especially during foliage season. Like most little houses, this one uses a few tricks to maximize the space, including a retrofitted attic ladder to access the loft and glass blocks to borrow light from the bedroom for the bathroom.

The afternoon was devoted to free time so that everyone could catch their breath. A group of us headed to the nearby village of Waitsfield for maple creamies and maple-bacon donuts, which we ate next to the river and covered bridge. We're loving these gorgeous October days!

After supper everyone gathered in the studio to spend a few hours working on site plans and layouts. In the Less is More class Dave Cain shared a trick for exploring scale in a little house by cutting out graph paper blocks and rearranging the spaces until it works, so I passed this tip along and several students gave it a try. Of course, others sketched, made models, or poured over inspiring books, too. It's amazing to see how the ideas have already evolved from the first day. I can't wait to see what everyone has come up with by the end of two weeks!