Building

T42 Build Blitz Kick Off

We're so excited to pick up our Tiny House trailer and get to work on the floor system! I can't believe it's just a week until we begin building another tiny house! Eeeep!

The past couple weeks, I've been working on The Lucky Penny Punch List so that I'm ready to focus my attention on my new tiny house. (See April Showers Bring May Flowers and Finishing an Owner-Built House!)

Later this week my partner Isha and I will pick up the trailer for, T42, the tiny house we're building for ourselves. On May Day, we'll begin setting up our build site at Green Anchors.

On Monday, May 2 we'll be kicking off a series of Build Blitzes for T42 and you're invited to join us! As is typical for a building project, we know that our T42 Build Timeline is subject to change, depending on weather, material sourcing, and progress made, but so far we're on track for the following timeline:

  • Monday, May 2 – Thursday, May 5: Tiny House Foundation & Build Prep
  • Monday, May 16 – Friday, May 20: SIPs Wall & Roof Raising
  • Monday, May 30 – Friday, June 3: Rainscreen, Exterior Trim, Siding
  • Monday, June 13 – Friday, June 17: Lofts, Interior Walls & Painting
  • Sunday, June 26 – Thursday, June 30: Cabinets, Built-Ins & Stairs

If you want some hands-on build experience, please join us for a week-long Build Blitz or for the day as a Tiny House Helper!

During this first Build Blitz we'll be working on the floor system for our tiny house, which will involve:

  • installing our undercarriage to protect the house from the ground - whether we're parked on on the road
  • insulating the floor system
  • installing our subfloor
  • making a cut list for our lumber package
  • measuring thrice and cutting once for our window framing, sill plates, and top plates
  • laying out and bolting down our sill plates so that the walls can be raised during our next Build Blitz
  • ensuring that our site and materials are ready for our Wall Raising Build Blitz

We hope some of you will be able to join us for the build if you're so inclined. And either way, please know that your encouragement and moral support are greatly appreciated!

Ordering Our T42 SIPs Kit

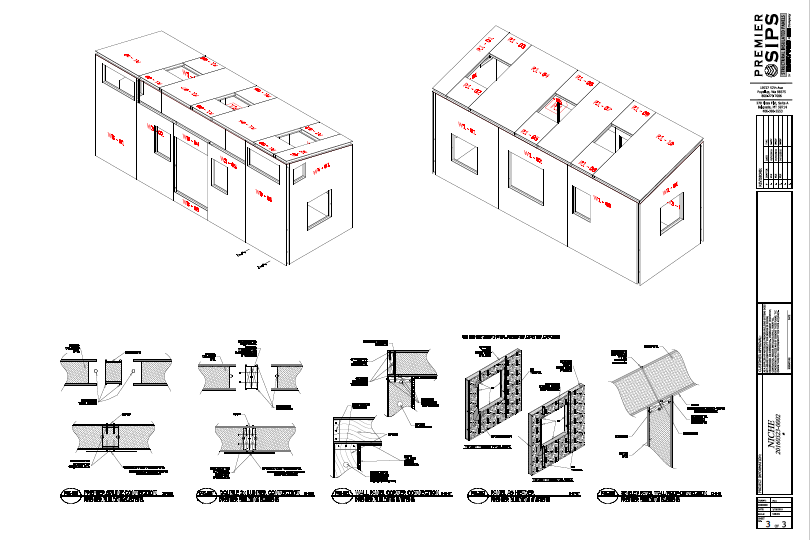
T42 SIPs Kit Shops A month ago today I sent the model for T42 (the tiny house Isha and I are building together) to Patrick of Artisan Tiny House so that it could be turned into a SIPs kit. Patrick knew this project was coming down the pipe so he was ready for it. When I said it was on the way he said, "Great! Let's get this wrapped up today or tomorrow!" I was all for THAT!

But we had some back and forth and it was finally Tuesday, almost a full month later, that we signed off on our shop drawings and sent our SIPs into production. This was due to three main factors:

  • The construction season is ramping up again and Premier, the SIPs manufacturer we work with in this area, is getting busier each week. They also had a couple people out due to unforeseen circumstances like jury duty and illness, so their turn around time slowed down.
  • Despite all I know about SIPs - which helps me make simple designs for my clients that are more affordable and easier to build - I can't seem to resist designing more complicated structures for my own tiny house projects. The Lucky Penny's walls went up in just an hour and a half on my SIPs Wall Raising Day, but the complicated curved roof with a skylight took another 6 weeks to complete! With T42, we have a set of windows high up in the wall, so Patrick, Matt, and I all spent time back at the drawing board figuring out how to turn my design into a set of SIPs panels. "SIPs aren't magic, just the next best thing," Patrick reminded me. Lesson remembered! The easiest way to get a SIPs kit is definitely to use one of the Artisan templates. (And, of course, it's always fun for me when my clients want to work with me to ensure that their tiny house shell will match their interior layout and suit their lifestyle!)
  • Just before we were about to order the SIPs, I spoke at the Tiny House Conference in Asheville, NC and I sang the praises of SIPs for tiny houses on wheels (THOWs) as I usually do. As usual, I had several people ask about toxicity and I explained that despite the fact that SIPs have one or two chemicals listed on the Red List (depending on the composition of the panels), even the Living Building Challenge - the world's strictest green building standard - approves SIPs for use in green buildings because they provide such good energy efficiency and the Red Listed chemicals are currently required by law to meet fire safety standards. But it got me thinking critically about this building system I love again and I pressed Patrick to get me some updated information about our options.

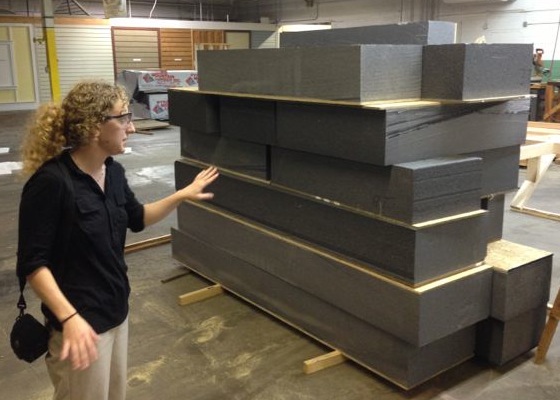
a photo from the Energy Vanguard article shows off SIPs made with GPS foam

Fortunately, Patrick shared an update that Premier has introduced a new SIPs option that uses GPS (graphite polystyrene) foam, which has a higher R-value per inch AND has swapped the previously used toxic halogenated flame retardant that was Red Listed for a poly flame retardant. (Stay tuned for more info on this product, but for now, please check out Neopor, which is the U.S. version of a product that has been used in Germany for many years now and read this post from Energy Vanguard). We also confirmed that the flame retardants are a hazard to us only if they're burning. We know that we can use a respirator when cutting the SIPs to accommodate the wheelwell, so that concern is easily addressed. (And if the house itself is on fire, we've got bigger fish to fry!) So we all breathed a sigh of relief and specified the GPS foam for this project. Patrick even agreed to cover the price difference for this one project since we agreed to be his guinea pigs for a new product. Despite the frustrations, we're both appreciative that we've had some learning opportunities. This is why I continue to do projects with Patrick: he's a generous and upstanding guy who wants to do right by people!

Patrick and Matt also figured out a solution to address my crazy SIPs layout and Patrick offered to come help us puzzle-piece it together during our SIPs Wall Raising Build Blitz. It will be great to have his expertise for this exciting wall raising scheduled for mid-May, which is just under 5 weeks away! If you'd like to join us, too, please claim your spot in the T42 Build Blitz!

Timeframe to Build a Tiny House on Wheels (THOW)

Alex-Lina-Kenny Now that Isha and I are prepping for first Build Blitz for our Tiny for Two (T42), we get asked all day long about our T42 Build Timeline. I wrote about that a couple days ago, but I wanted to elaborate here in case you've been wondering "How long does it take to build a tiny house?"

Professional Builder

  • If you plan to have a professional build your tiny house, it’s reasonable to expect they’ll have the house built within 2-3 months from the time they begin construction, assuming your house is one of their priorities and they don't have a lot of other projects going on.
  • If your builder is constructing one of their stock models for you, it will go more quickly than if it's a custom design.
  • If you're going for a custom design, anticipate that you'll spend some time upfront before the build begins to refine the design and specify the materials. Keep in mind that this work on the front end will save you time and heartache on the back end. This is a perfect example of "Go slow to go fast!"
  • If someone is promising to have your tiny house built in less than 6 weeks, learn more about their track record by contacting other people who have had the company build for them in the past.

Building Yourself WITH Experience & Time

  • If you plan to build your house yourself AND you have some building skills AND a great network of handy friends AND you’re not working full time you can probably do it in 3-9 months.
  • A good rule of thumb for intermediate builders is that everything will take twice as long as you initially anticipate!
  • The very quickest DIY build I’m personally aware of is the Vagabode, which took 2 months. It was completed using SIPs (structural insulated panels) which go together more quickly than a stick-built tiny house. It was built by a couple who had done lots of planning and were working on the house more than full-time. They also had friends and family in the trades with good construction and project management skills.
  • It took Dee Williams 3 months to build her 84 square foot little house, working on the house full-time. She has a background as an architectural engineer and a lot of handy friends. She's also a badass!
  • I had build and project management experience and it took me six months to build my tiny house, The Lucky Penny, while working ¾ to full time. My tiny house is a little smaller than most out there these days but it's also a little fancier. I have a curved roof with a skylight and a preposterous number of shingles! I hosted work parties most weekends. I took a six-week break after building the shell to travel, work, and play then resumed building.
  • Building Yourself WITHOUT Experience & Time
    • A good rule of thumb for beginners is that everything will take three times twice as long as you initially anticipate!
    • If you plan to build yourself AND have no experience AND have few handy friends AND you’re working at least part time, expect that it may take you 9-12 months or longer to build your tiny house.
    • Many people with no building experience are interested in building their own tiny homes and estimate it will take them 3 months. Many of them take a year or longer to complete their homes.
    • If you saw the films Small is Beautiful and Tiny: The Movie, you'll know that novice builders Ben and Christopher underestimated their tiny house build timelines considerably, but once they realized what they were in for they decided to hunker down and take the time to learn how to do it well. Both of them built themselves lovely homes over the course of about a year.
    • I have several friends, including Angela Ramseyer of Mighty Micro Built and Matt and Laura LaVoie of Life in 120 Square Feet who took three years or more to build their tiny homes. These folks were early adopters of the tiny house movement and there weren't nearly as many resources available as the time they began building, so there was a lot of learning along the way!

So how long will it take you to build your tiny home? Honestly, the best answer is still "It depends." It depends on the weather, lead times, your health, your friend's availability, material sourcing, and the many hiccups that will happen along the way (see Plan F: Take 2). But I highly encourage you to create a good plan and then jump on in and enjoy the journey! (And if you'd like a right hand woman for the adventure, check out The Package Deal!)


Tiny Remodeling Project

my new comfy chair replaced my mini chest freezer Spring has arrived early this year in the Pacific Northwest and we're already having days that are warm enough that My New & Improved Chiller can't quite hack it! Meanwhile, I'm headed to DC tomorrow to teach a Tiny House 101 Workshop with the Tiny House Collaborative this weekend and then on down to Asheville for the Tiny House Conference. So I figured I'd better get The Lucky Penny ready for my landie Jake who is going to house and cat sit for me while I'm away.

Part of my design for The Lucky Penny was to have room for a My Fridge-Only Mini Fridge and my separate Mini Chest Freezer so that I'd have lots of capacity to prepare food and freeze homemade leftovers. The freezer also doubled as a step up to my lofted Pull-Out Bed. The mini fridge tucks under the counter in the warm months and stores in The Big House basement during the cool months when I need a heater but not refrigeration. (That's when I rely on My New & Improved Chiller.) This set up has worked pretty well for me for the past year.

However, now that I'll be building a new tiny house with my partner (check out A Tiny Announcement from Lina & Isha for more on that!), I'm starting to think ahead to how I can prepare my little house to be a short-term rental. That way other people can enjoy a stay in The Lucky Penny and try on tiny for themselves! I figure people who are staying for a short visit won't get much use out of a chest freezer and they may find it inconvenient to step outside during the cooler months to access things in the chiller. Additionally, the thing my house has missed ever since I jettisoned it in favor of My Fabulous Tansu storage unit, is a comfy sitting spot on the first floor. I haven't minded much because I like perching on my window seat, but when visitors come round (and especially if they're not spry enough to clamber up to my lofted sitting spot), they tend to just stand around.

So this past weekend, along with working on Garden Beds & Graywater, I did a tiny remodeling project to replace My Fridge-Only Mini Fridge with a mini fridge-freezer combo and replace My Mini Chest Freezer with a comfy chair.

Mini Fridge & Freezer

My friend and tiny house dweller Anita of Lilypad Planet passed on the mini fridge with separate freezer she was no longer using. (It turns out those of us who eat whole foods need plenty of storage space for them, so she upgraded to an apartment-sized fridge with freezer.) Unfortunately, since I raised my kitchen floors, the new fridge/freezer combo didn't quite fit inside the space under my counters. So instead of just swapping it out, I had to do some remodeling. I removed the countertop, which also involved removing the sink and faucet. I figured while I was at it I might as well add a ball valve for the shower, too. Then I cut back the 3/4" plywood underneath my wooden counter so that the new fridge with freezer would fit. I double checked all my measurements, got out the circular saw, and went for it. Fortunately, it works splendidly!

Meanwhile, I'd been eating up frozen foods over the past couple weeks so that I could stuff what was left into my now teeny (but actually functional, thank you!) freezer. Tony and Isha helped me move the chest freezer down to The Big House basement where it can be shared by the community. And I replaced it with a comfy chair!

Now that everything has been put back together, I just need to reinstall the trim piece at the front of the countertop, caulk that seam and the sink, and find risers for my chair legs so that it's not such a big hop up to the bed. The cat food cans are just the right height so they were a good improvisation, but I'm sure I can come up with something better!

I sat in my new chair for a bit yesterday while working on our Tiny House Timeline and enjoying the rain and the new perspective. I'm quite pleased with the remodel and I think other folks will enjoy it, too!

Garden Beds & Graywater

Planter-Box-Graywater.jpg

Lucky Penny & Planter It was gorgeous on Saturday and rainy all day Sunday, which worked out perfectly for my weekend projects. On Saturday Karin, Isha, and I picked up a yard of white lightning compost and soil mix from Dean Innovations and a couple big blocks of coconut coir from Portland Nursery to fill up our raised garden beds at Simply Home Community. Karin also snagged a few fragile little pea plants, too, so it was quite an adventure getting all this garden goodness back home in Karin's lil red truck!

Karin and Isha filled up their garden beds with this rich, black soil mix then helped me fill up my two raised garden beds as well as my raised planter. My raised planter is a shipping crate that Isha and I found on the side of the road when we were on a run a few weeks ago.

I had been envisioning a raised bed like this next to The Lucky Penny because it seemed the perfect way to create an elegant solution to address multiple issues (hello, permaculture!)

  • The planter will be pretty with plants growing in it.
  • Tall plants like sunflowers may grow tall enough help to provide a little summertime shade at my kitchen window from the hot western sunsets.
  • The planter helps create a wind-block to prevent chilly air from blowing under my house.
  • It hides the otherwise unsightly storage under my house, and
  • It is now part of my graywater system!

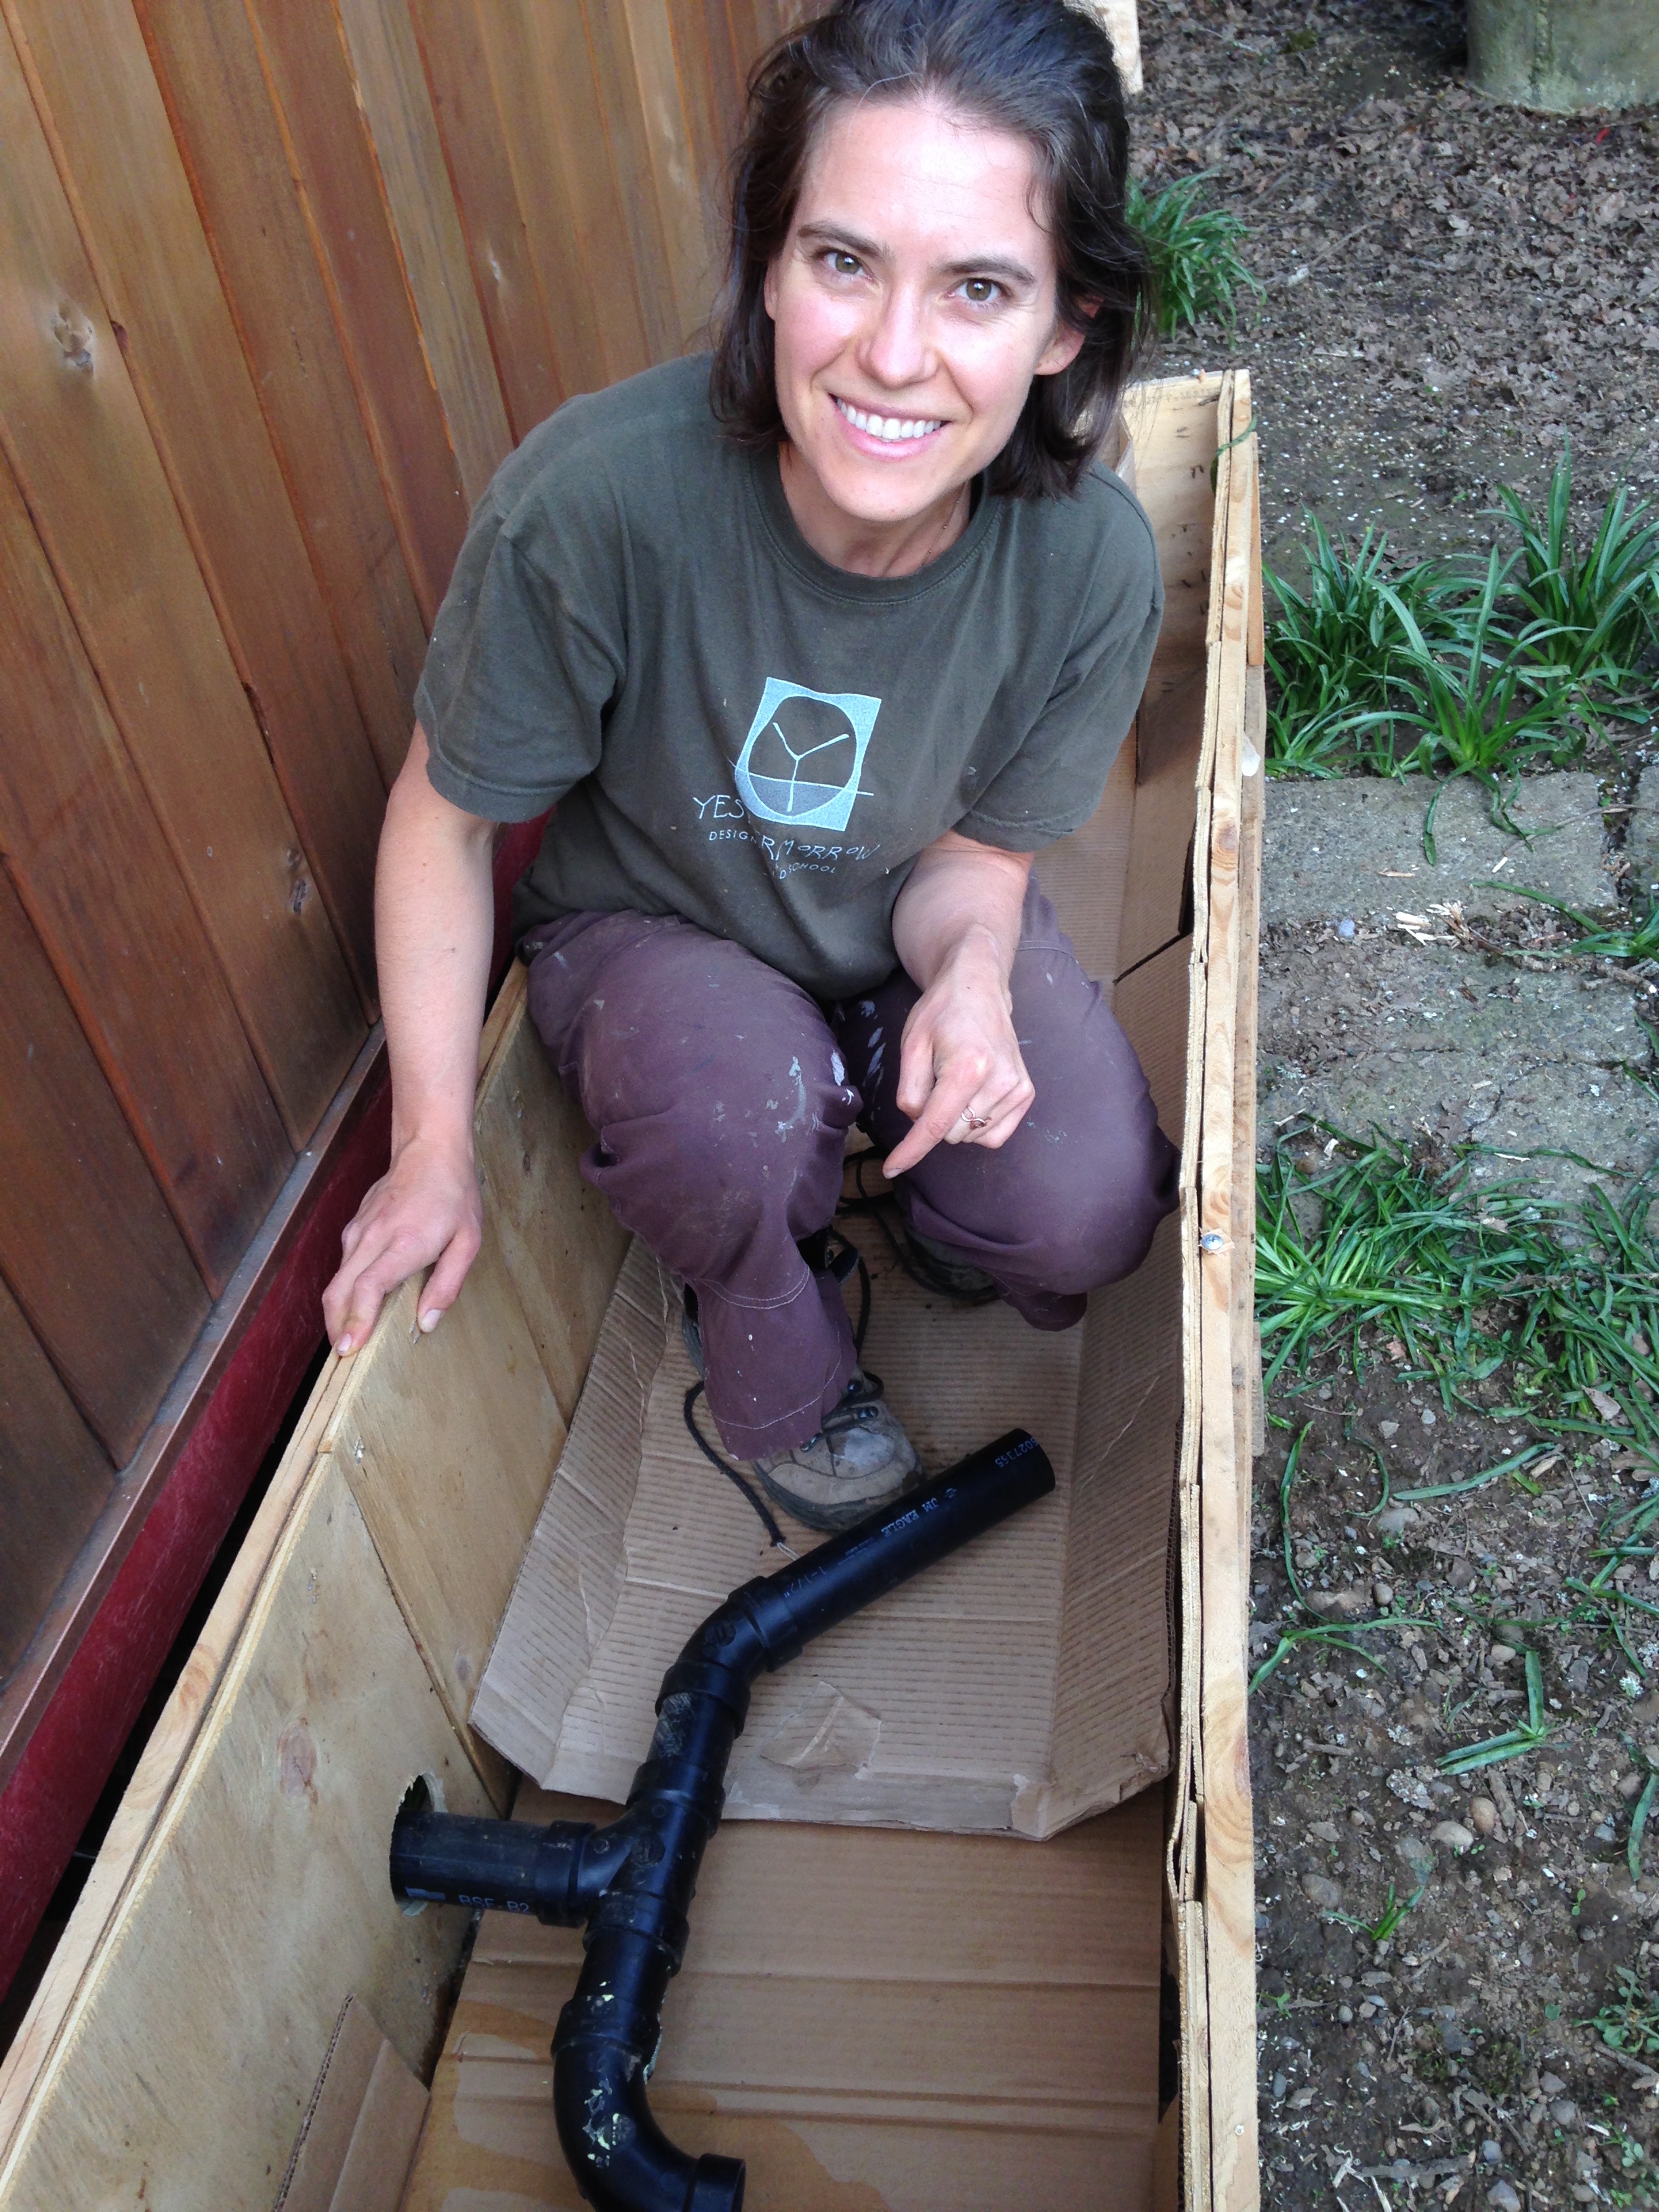
my new graywater dispersal system

On Saturday I connected my kitchen sink and shower drains to ABS pipe that flows towards the raised bed then drilled two holes through the planter and used spare plumbing parts to disperse the water inside the planter. I then lined the planter with cardboard and tested the water flow to make sure it would distribute well. Then we filled the planter up with coconut coir (which is relatively light and friable as well as being good at holding moisture) and the white lighting soil mix.

This spring I'll be planting food and flowers in the planter box. I'd love to do carrots because it's nice and deep, but I understand it's better to not do root veggies in a graywater system. After living in my Home, Sweet Yurt with no running water, I've figured out how to be meticulous about graywater. I learned to wipe out my dishes with an unbleached paper towel and pop that into the compost and THEN wash my dishes with a biodegradable soap. At Simply Home Community our Community Living Agreements provide a very short list of approved biodegradable cleaning products and soaps. (Please note, too, that I DO NOT have any blackwater in my water system!)

Planter Box & Graywater

So I plan to do sunflowers because they are beautiful and get tall enough that I may be able to enjoy them even from inside! I'll also probably do tomatoes here because they send down deep roots and prefer being watered low (they HATE having their leaves wet!) And it seems I'll be doing peas, too. Yesterday when it rained the water dripped right off my metal roof into the planter in a nice little line so that's where I planted the pea seeds I'd been inoculating. I know it's a little late to be starting peas, but I hope that the ability to drink up spring rain gives them a boost! Perhaps they'll be able to climb the sunflowers, too...

I also did a few tiny house remodeling projects involving my kitchen counters and my mini-fridge because everything seemed to be coming together time-wise. You can read more about that in an upcoming post this week. Stay tuned! Until then, enjoy this spring rain!

Window Shopping Again

T42-Front-Elevation.jpg

Our Tiny For Two (T42) will have LOTs of windows for natural light and views! In case you missed A Tiny Announcement from Lina & Isha, The Guy Next Door and I are building ourselves a tiny house, starting this spring. We ordered our brand new PAD Series trailer from Rob at Iron Eagle Trailers a few weeks ago. So the time has come for us to do some window shopping.

Windows and doors can take up to 6 weeks to arrive (especially if any of them are custom). So it's a good idea to get moving on windows long before you're ready to start building. Although the only non-standard components of our glazing package are Our Hobbit-Sized Outswing French Doors and the transom window above them, we needed to have our windows dialed in before we could submit our design to Patrick from Artisan Tiny House, so he can turn it into a SIPs kit. As you might imagine, our timeline nudged us to make our windows the top priority this week since I returned from the Cilantro Poncho Build Blitz in Tucson, AZ.

So here’s a little about window shopping. A few years ago I had a bout of Successful Window Shopping when I was helping Jane collect materials for her Tiny Barn. My Tiny House Started with a Window, too. It’s a beautiful arched window I acquired for free from my alma mater, Whitman College when they were replacing windows a few years ago and I decided to build The Lucky Penny around it. My Beautiful Arched Door has a leaded glass window in it and I have a massive skylight running the length of The Lucky Penny, so I knew I’d have lots of light. I was only looking for two more windows and I ended up finding My Kitchen Windows at the ReBuilding Center just before I was going to order custom windows. Several of my design clients have also pieced together their window packages using high-quality salvaged windows, especially if they are fond of a hodge-podge look. So most of my previous window shopping experience for tiny houses – and by this I mean actually acquiring windows rather than browsing the bazillion amazing products that might go into a highly-designed small space – has involved salvage.

On the other hand, over the past couple years I also helped the Marshlains and the Meyerhofers with their window shopping as part of the project management we did leading up to their build blitzes. Both of these couples decided that they didn’t want a hodge-podge look and they didn’t want to spend time scouting for windows at the rebuilding centers. Isha and I are currently in the same situation for the tiny house we’ll be building. We want a cohesive look and there are some particular sizes we’re after to make our design work well, so we’ve decided to go with a collection of new windows.

Once we had determined which window sizes we wanted (big!), what material we wanted (fiberglass!), and how we wanted them to open (every which way!), we turned this into a list of windows (called a "window schedule"). We sent our window schedule to a couple of companies in our area for quotes. We ended up having great conversations with Sue at the NE Portland Home Depot and Todd at Parr Lumber. Sue recommended Milgard windows because they’re locally made, have a lifetime warranty, and have a reputation for good customer service. Todd recommended Marvin because they have a good reputation for quality and the price point is pretty reasonable. Both of these folks have a passion for tiny houses and they were both amazing to work with, so if you're in the market for new windows in the Portland area, give them a ring!

Once we had enough information to compare casements to awnings, we realized that the Marvin quote was about $1300 less than the Milgard quote. However, Marvin isn’t able to do any colors other than white for the interior and neither Isha nor I particularly like white nor felt like doing a bunch of detailed painting. So we took a walk around the block to discuss. Isha and I both agree that if it's something we're going to interact with daily and never planning to replace, we'd better get what we like best. So we decided to go for the Milgard windows even though they were more expensive than we'd originally planned to allocate for windows. As we refine Our Tiny House Budget, we'll need to figure out where to make up for the splurge. We’ll be finalizing our window order this morning. Hooray! It’s another great tangible step towards our tiny house dream.

Next up: Ordering Our Tiny House SIPs Kit!

A Tiny Announcement from Lina & Isha

Now that the Meyerhofer's Tiny House, Cilantro Poncho, has sprung to life in Tucson, AZ through last week's build blitz, Isha and I have decided it's time to make a tiny announcement of our own.

As many of you know, last summer I fell in love with The Guy Next Door. For the past nine months Isha and I have been living in his and hers tiny houses at Simply Home Community

Now Isha and I are expecting... that our baby will be here with us in about 9 months. And yes, we already know what it's going to be!

We're making a Tiny For Two!

We're affectionately referring to it as T42 or "tea for two" for the time being, though like most expectant parents, we're still considering names.

just consider this photo the ultrasound image for our new tiny house

This is, of course, what sometimes happens after a bad case of Trailer Lust.

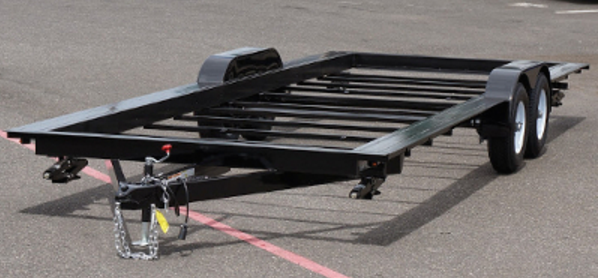
Isha and I placed the order a couple weeks ago for our 24' PAD Series Tiny House Trailer from Iron Eagle Trailers in Fairview, OR. (Yes, we even know how big it's going to be when it arrives. In fact, we were specific about that!) Rob built the trailer for my vardo, The Lucky Penny, so we know it's going to be a great foundation for our new little house. The trailer should be ready by the end of March and we'll begin building in April. We're deep in the design phase right now and we're looking forward to revealing the design soon. We've been Window Shopping Again and looking forward to Ordering Our Tiny House SIPs Kit. If you'd like to help out with the build, please get in touch.

Stay tuned for more! We're rather giddy and excited to share our new little house with you!

Cilantro Poncho Build Blitz Day 6

Day-6-Team-Photo.jpg

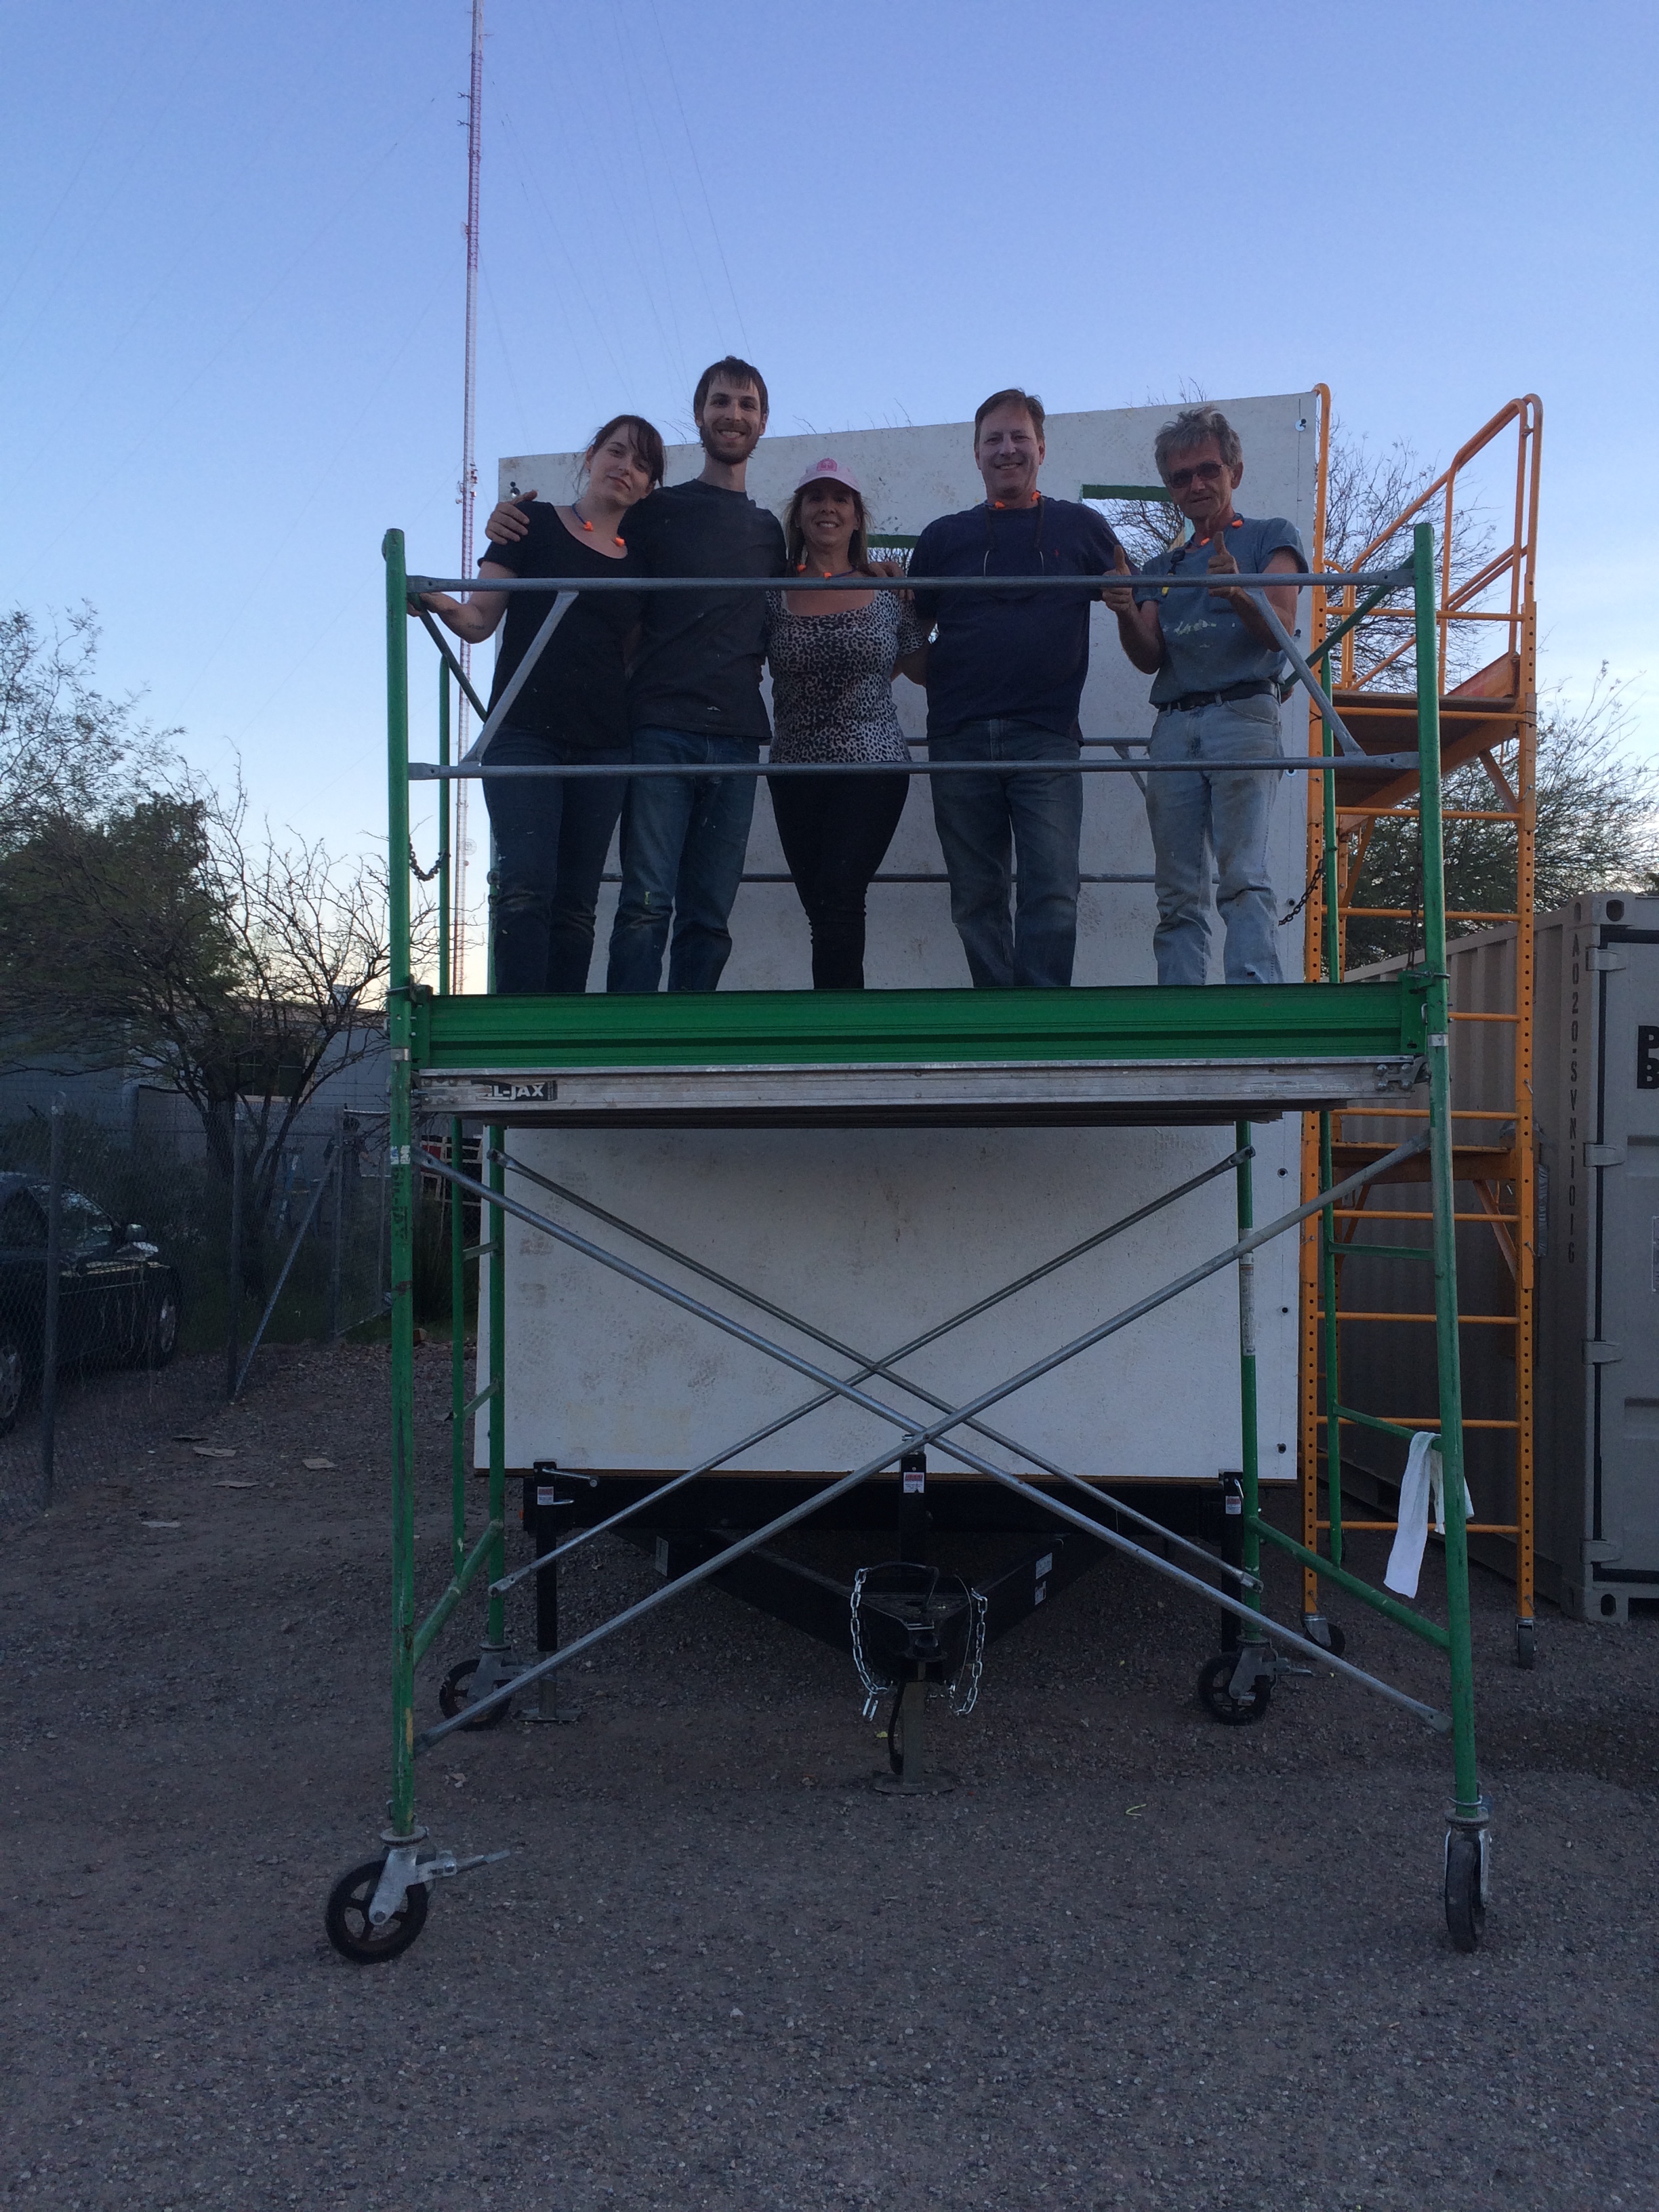
Cilantro Poncho Day 6 Team Photo Yesterday was Day 6 (our final day!) of a week-long build blitz for the Meyerhofer’s tiny house, Cilantro Poncho. Day 1 was a prep day, Day 2 and Day 3 we worked on wall raising, Day 4 and Day 5 we prepped for the roof, and yesterday we finished the roof and touched up our water resistant barrier!

The day’s tasks included:

  • Finishing liquid flashing around the away room windows
  • Applying sealant to seams and troweling smooth
  • Cut out the sill plate at door
  • Finish liquid flashing at door sill
  • Touching up the water resistant barrier with one more coat
  • Installing roof splines
  • Installing remaining roof sections
  • Installing perimeter framing

At lunchtime we had a picnic inside the new house and Courtney and Kurt gave those of us who helped all week very thoughtful gifts. During the afternoon we finished up the framing around the roof perimeter and did the final touch ups on the water resistant barrier.

In the evening Kurt and Courtney hosted Cilantro Poncho’s First Open House. This was a chance for people who were curious about the tiny house to come take a peek and see the progress we made in a week. Andy, who had helped the first two days of the build blitz came back down from Tempe to see how much more we got done in 4 more days and Walt and Bernice Venable (who I did some concept design work with) came to take a look so I got to meet them in real life.

As the evening sky broke into a magnificent sunset I gave them my parting gift, which seemed quite appropriate for the adventure they’re embarking upon. Fortunately, it wasn’t quite goodbye. We’re meeting up this morning for breakfast to talk about next steps and to sort out tools so I can pack for my journey home. What an incredible honor to help make this tiny house dream come true for the Meyerhofers!

Cilantro Poncho Build Blitz: Day 5

Day-5-Team-Photo.jpg

Cilantro Poncho Day 5 Team Photo If you’d like to come see what we accomplished during the Cilantro Poncho Build Blitz, please come visit us for Cilantro Poncho's First Open House at 5:30 pm on Friday, March 11 at 4674 N Kain Ave, Tucson, AZ 85705.*

Yesterday was Day 5 of a week-long build blitz for the Meyerhofer’s tiny house, Cilantro Poncho. Day 1 was a prep day, Day 2 and Day 3 we worked on wall raising, and Day 4 we got our final wall panel up and prepped for the roof. Yesterday we finished up roof prep, applied liquid flashing for the windows, and got the first two roof panels up.

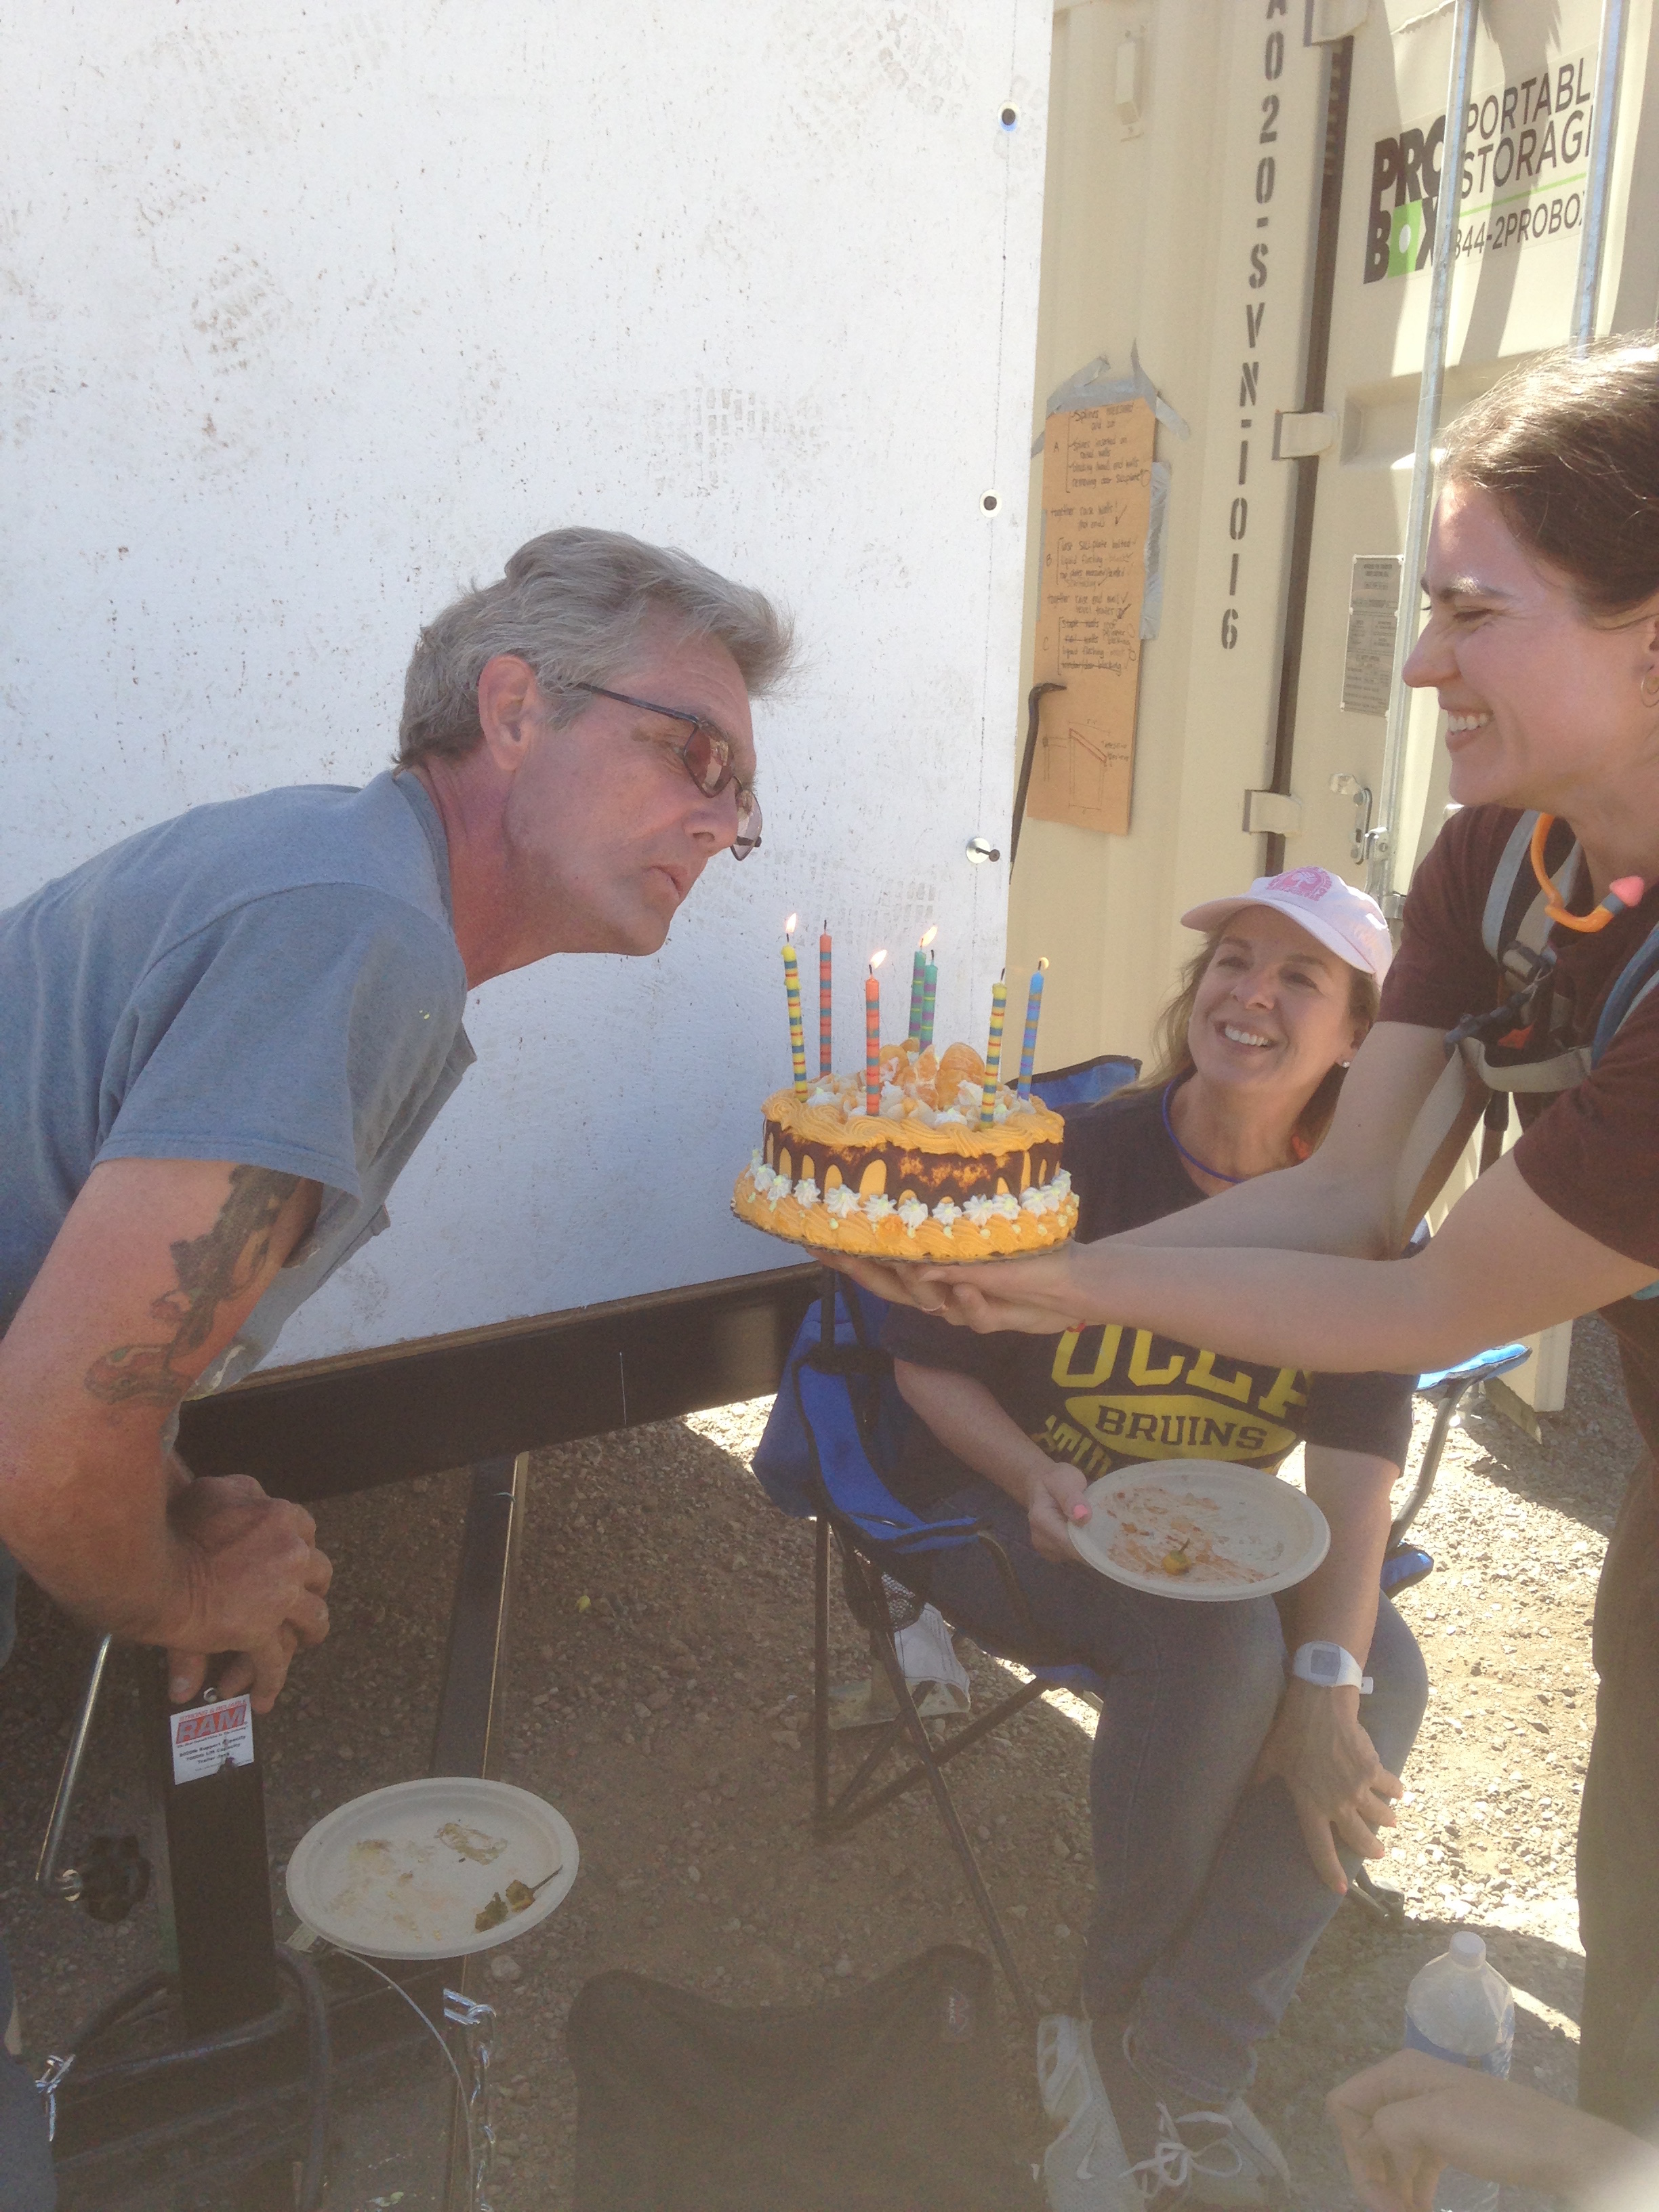
Richard blowing out the candles on his bday cake!

We also had a special lunch and dessert for Richard, who was celebrating his birthday. It’s so cool that he chose to spend his birthday week helping Courtney and Kurt to get their little house started! His help has been invaluable this week and we’re so grateful for him! Richard’s birthday presents from me were enrollment in my upcoming Tiny House Considerations Course and a design consultation, so I’m glad that I’ll get to help him move his tiny house dream forward, too.


The day’s tasks included:

  • Beveling perimeter framing for roof panels
  • Leveling the trailer
  • Applying liquid flashing around the exterior of the windows
  • Cutting and attaching “outriggers” to the end roof panels
  • Hoisting the first panel into place
  • Squaring up the panel
  • Attaching the first roof panel to the top plate with SIP screws
  • Installing the first spline into the second panel
  • Installing the second panel

It was hot yesterday so we were mindful of staying hydrated and sunscreened. We also took breaks in the shade whenever we needed them, but we still made good progress. After all the head scratching related to the trailer camber on Day 3, it was exciting to see how nicely the house settled onto the trailer and leveled out once we removed the shims and lowered the stabilizing jacks. Having the top plates attached at the top of the walls really helped and we expect the additional weight of the roof panels will make the house level out completely.

Mark, Richard, and Kurt worked on ripping, beveling, and mitering the remaining framing for the perimeter of the roof panels while Courtney prepped the roof panels for the framing by removing a little excess foam with the 6” foam cutter. Meanwhile, Andrea worked on liquid flashing on the windows. All those years of cake decorating have made her our go-to liquid flasher! She’s good! Courtney and I joined Andrea for window flashing a while later and I enjoyed visiting with Courtney while we passed the sausage gun back and forth. With so many power tools going all week long, it was nice to have a little quiet time to visit!

Getting those first two roof panels up was really exciting and we were tempted to do more, but it had been a long, hot day and Andrea and Mark had a special invitation to have supper with some friends of theirs, so we decided to end on a high note. And by a high note, I mean that Kurt and Courtney climbed up onto their roof to admire the view of the Santa Catalina Mountains!

Tomorrow we’re eager to get the last of the roof panels on, do some touch ups on the water resistant barrier, and install a window so Courtney and Kurt know how that’s done.

If you’d like to come see what we accomplished during the Cilantro Poncho Build Blitz, please come visit us for Cilantro Poncho's First Open House at 5:30 pm on Friday, March 11 at 4674 N Kain Ave, Tucson, AZ 85705.*

*If you’re reading this after Cilantro Poncho's First Open House and you’d like to visit, please be sure to contact Courtney and Kurt to arrange a day and time. They can’t accept unannounced visitors because they’ve got work to do finishing their little house and they need to make sure everyone who visits can do so during a time that’s safe. Thanks!

Cilantro Poncho Build Blitz: Day 4

Day-4-Team-Photo.jpg

Cilantro Poncho Build Blitz Day 4 Team Photo

If you’d like to come see what we accomplished during the Cilantro Poncho Build Blitz, please come visit us for Cilantro Poncho's First Open House at 5:30 pm on Friday, March 11 at 4674 N Kain Ave, Tucson, AZ 85705.*

Yesterday was Day 4 of a week-long build blitz for the Meyerhofer’s tiny house, Cilantro Poncho. Day 1 was a prep day, Day 2 we began the wall raising, and Day 3 we got all but the last panel up, so we were eager to get that last wall up yesterday.

We worked in pairs to accomplish the day’s tasks, including:

  • Bolting down the last sill plate
  • Erecting another set of scaffolding
  • Beveling & installing top plates
  • Creating a plan for beveling roof perimeter framing and testing a piece with an 8” board
  • Installing framing in door & remaining windows
  • Applying liquid flashing to rough openings (ROs)

Once we got our final sill plate bolted down that final panel slipped right into its spot so nicely it felt like it was magnetized! It was awesome to have the house finally be a box!

We were on a roll when quitting time came along so we continued working for another hour in the cooler evening air. We have two more rough openings to flash with the liquid flashing and some beveling to do for the roof perimeter framing, so that we can get our first roof panel up. I found myself dreaming about that first roof panel going up last night. It will be fun to make that dream come true!

*If you’re reading this after Cilantro Poncho's First Open House and you’d like to visit, please be sure to contact Courtney and Kurt to arrange a day and time. They can’t accept unannounced visitors because they’ve got work to do finishing their little house and they need to make sure everyone who visits can do so during a time that’s safe. Thanks!