Another tiny houser lives just around the corner!

This week I had the pleasure of meeting a carpenter who has built her own tiny house in the backyard of the property she owns in Northeast Portland. Katie's green eyes start twinkling as she shows me around her Little House: her cozy abode, her labor of love. Katie's only a few inches taller than me and she teaches carpentry for a living. Needless to say, I have a new hero. And since her house is still a work in progress and she's one of my nearest neighbors, I hopefully have a new mentor as well. She'll be working on the Little House each weekend this spring and I've promised to set aside the books when I can to help out.
Katie considered building her tiny house on a trailer but decided against it for two main reasons. First, she wanted a wider house. The 8'5" restriction on width that makes a tiny house on wheels street legal is a major constraint in terms of layout. It's amazing what people have managed to do with less than 9 feet of width, but it's even more amazing what you can do if you have three more feet with which to play! Second, Katie wanted to use natural building materials and was particularly interested in trying out light straw clay for her wall system.
Unfortunately, natural building wall systems and mobility don't play well together. Natural materials are often heavier than synthetic materials and they are more fragile. Plaster and tile are likely to crack if moved and natural insulations are more likely to settle. Natural materials also take up more room to achieve the desired effect. For instance, straw bales provide fantastic insulation against cold and noise infiltration, lend themselves to neat windowsills and windowseats, and create an amazing surface for plaster. I've worked on two straw bale houses and I look forward to building my straw bale dream home someday. In a place like Walla Walla, where straw is a waste produce of the wheat industry, straw bale is a sustainable and appropriate building material. But even if you place bales "on edge" (on their narrowest side), you're still looking at fourteen inch thick walls!
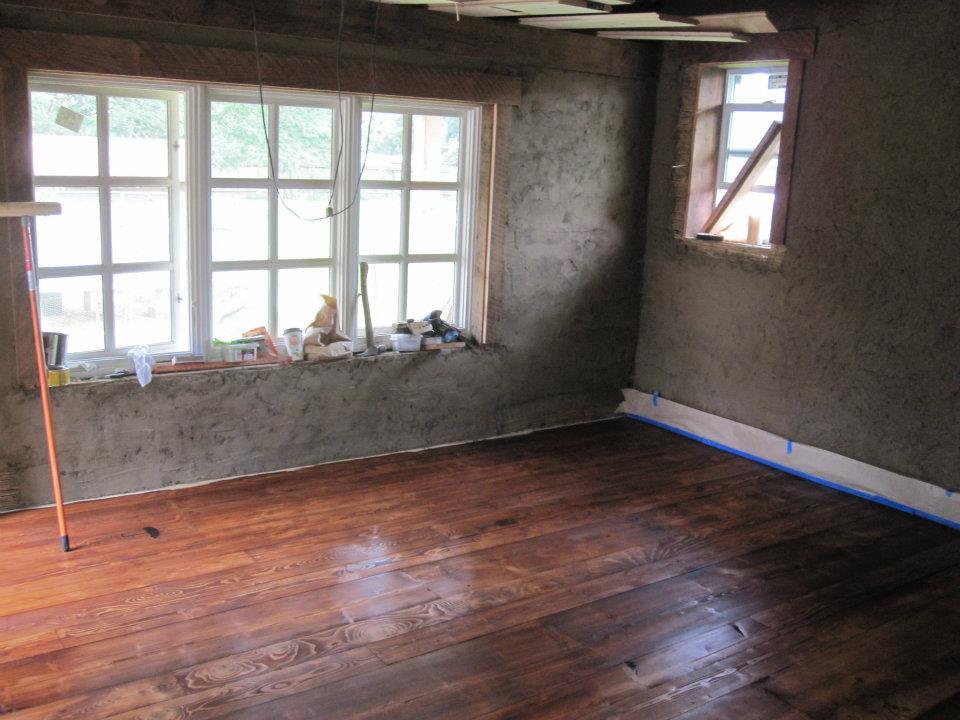
Light straw clay walls can be built much thinner than straw bale walls, but they still require more space than stick framing. Katie's light straw clay walls are 8 inches thick to provide the same insulating value as a standard 2 x 6 wall. Light straw clay is a mixture of clay and straw that is compacted into the wall cavity using either plywood slips or woven mats to hold the material in place while it dries. Light straw clay has the insulating properties of straw with the massive properties of clay and once it is covered in a homemade plaster the walls have a beautiful natural look. Katie's will be a nice creamy color that will brighten up the space and contrast nicely with her dark wood trim and floors. The thickness and fragility of natural wall systems simply aren't practical for a tiny house on wheels. So Katie decided to build directly on-site.
After drafting up dozens of different floor plans she settled on the current layout which includes a main room for socializing, cooking, and lounging, a bathroom, and a sleeping loft that extends over a deep porch. Beautiful beams that run across the width of the house will remain exposed when the peaked ceiling is covered with lath strips. Her bathroom will be a wet bath with a shower head in the ceiling and a drain in the floor. It will include a compost toilet, a soaking tub, and a little corner sink. Katie says her love for entertaining was a guiding aspect of her design. Even though her house is only 190 square feet her fold-out table and open kitchen plan allow her to comfortably host dinner parties for a dozen friends at once. Many of the materials for the house are salvaged including beautiful wood flooring, roughhewn trim, and an apartment-sized electric range and oven. She has shaped her house around the windows and door that she acquired for free. (She's currently on the lookout for two round windows for the loft. If you know where she can score a couple, let us know!)
Katie has enjoyed the sense of independence of doing most of the work herself, but she's also grateful for the help of some talented friends and family members. A group of friends joined her for a light straw clay work party. Her sister, an electrician, is doing her electrical work and a friend who does iron working is helping with shelves. She plans to have a couple more work parties this spring so that she can move in and enjoy summer in her Little House. She is particularly looking forward to sitting out on her covered porch in the evenings to watch her chickens pecking around the garden while the sun sets.
Cheers to that!


